Finally, the last part of the rock slider build! Lets finish them up and see what they look like completed. The goal is to have some beefy nerf bars we can use to rub against rocks and still be able to open the doors after a long day of wheeling!
We left off part 2 looking roughly like this. The new rockers were welded in but not completed.

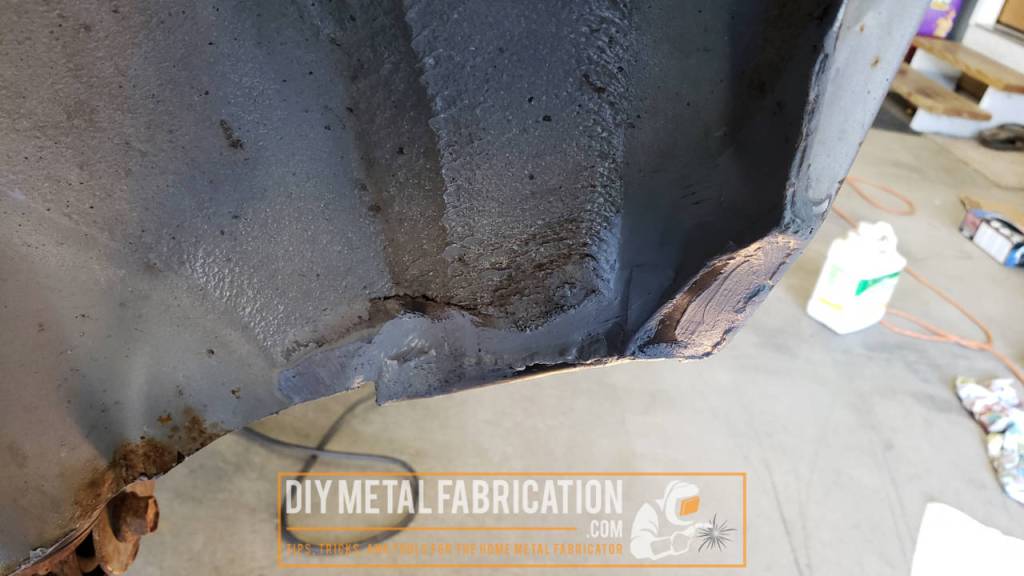
Sealing and Painting the Rockers


Installing the Rock Sliders
10 months ago, I built the main bars of the rock sliders, finished cutting off the rockers, and welding on the above plates. As you can see we have been through a winter since then and even that work has since gotten rusty. Now that there is a wheeling trip coming up this weekend, I finally worked up enough motivation to clean / paint it all and finish the rock sliders.

In a home fab shop, it is often easier to keep some simple tabs in stock for moments like this. They save a lot of time especially when the only opportunities I usually get to work are between 8pm and midnight after the kids are in bed.


Making your own 1 3/4″ Tubing caps
On one of my previous trucks, I told myself I was going to cap off the tubes ‘later’ when I was building the bumper. Years later I was still having rusty water and mud drain out of the tube that I never capped. Now that I know myself better, I forced myself to go ahead and cap the ends of the rock sliders PRIOR to putting them on the truck. Here is a cheater method I used to make the caps using just stuff I had laying around.

These tools are usually called a copper welding spoon or welders helper. Handy for sheetmetal and random projects like this. They are a little more expensive than I remember, I am guessing it is just due to copper prices lately?


Notice I put the washer on the end and not inside the tube. I wanted the weld to be a fillet weld and not a butt weld where I would have had to grind most of it all off to get it flat.

No I didn’t sand it until it was perfect… it’s only purpose in life is to get stepped on and rubbed against rocks.

I got the sliders up in position with the jacks then used the jackstands to hold the tubes to the frame as I was test fitting and welding them.

Yep, that is what happens when you run out of time/motivation and say “I will weld on the rock sliders after this wheeling trip…”

The frame side had to be low on the reinforcement plates to make the tubes at more of an angle to miss the rocker panels. I wanted the sliders up as high as possible since this rig sits really low.


Another example of random tabs and gussets that are good to have on hand. I have had these for years waiting for their time to shine. That time was today 😀


That muffler is another story though, it has already fallen off once…


There you go! Rock sliders built from scratch in a home shop. This is the classic buy vs make decision. I might have been able to buy some for $500-$1000 plus shipping but I want to keep the budget for this rig small and I enjoy doing projects like this anyways. I have quite a few man hours into these puppies but in the end it was worth it. If you don’t have a tubing bender, you can always change the design or cut and weld the tubes at angles instead.
Now YOU, go outside and make something!
Got a project in mind?
If you're tired of getting ignored by big shops or just want someone who actually gives a damn about the build, that's what I do.
Let's talk →