Quit breaking your back in the driveway! If you already have an offroad truck with a winch and some skills with a welder you can make your own plow! Here is a write up on how I built a snow plow for the front of my offroad truck using mostly scrap metal and the winch I already had on the front of my offroad Suzuki Vitara ‘PJ’.
Starting with Version 1
I am starting with an existing plow that I built about 5 years ago to pull behind my car and van. It had a small ATV winch and lifting structure with a blade frame and HDPE cutting edge that all fit nicely into a 2″ receiver hitch and required nothing more than a 10 gauge power and ground wire. You can read the entire 6 part series on it starting here. It contains instructions for how to build the blade that I will be re-using in this post: DIY Receiver Hitch Snow Plow Part 1
Here is a picture of the previous version:

Gathering the parts for Version 2
What do you need to start out with for this version 2 build?
A front end that has a receiver hitch in the middle and a winch. Most jeeps and pickups have aftermarket availability for front bumpers with a winch and receiver hitch. If you have a Jeep Wrangler you could bolt the winch in the factory spot then add a receiver hitch up front. The rest is just building a lifting frame and plow blade.
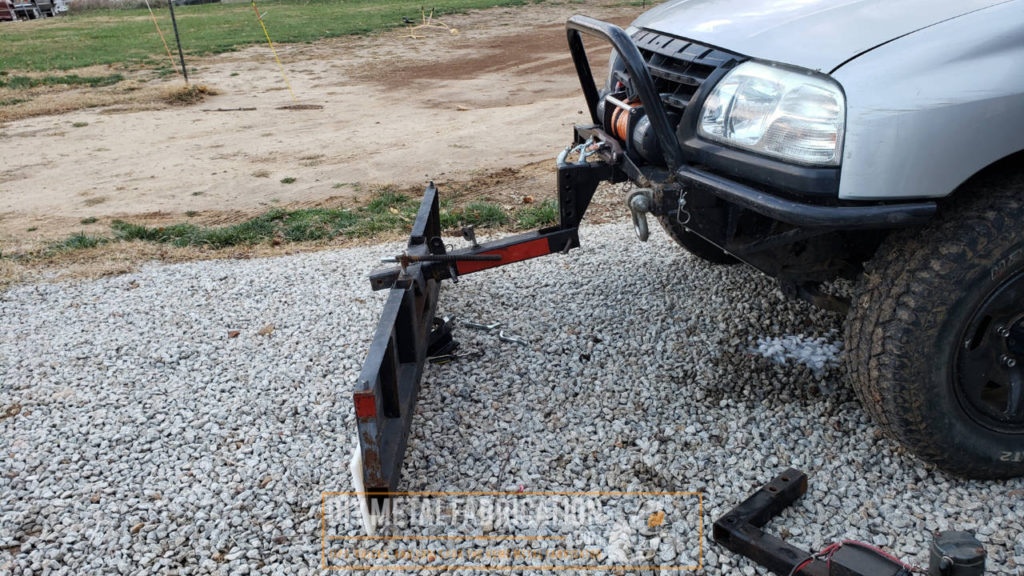
In my case I just got done building a full custom front winch bumper for PJ with this exact use case in mind. This is the reason that it actually has 3 receiver hitches up front (I like options…).
Stating the obvious just in case, this is purely a homeowner plow / play toy. It actually does plow pretty well but it is not commercial strength and if you run it into curbs it has no trip edge and will bend or break.


As a random note about building stuff using common dimensions. When I originally built this plow I used standard 2″ square 1/4″ wall tubing which fits inside 2.5″ square receiver hitch tubing (also 1/4″ wall) and common 5/8″ hitch pins. Because I went with standard materials I was able to just un-pin the lifting arm from my old frame and pin it directly on to the Maxx Haul drop hitch which saved a lot of time.
Just as a general note it is good to use common dimensions and parts for whatever you might be building that way it is easy to repair and upgrade in the future.


What I was doing in the picture above was trying to figure out what height and what materials I could use to have a frame that the winch line could go up and over for lifting the plow. I ended up with a tube that was about 9″ tall and a large D ring that is no longer certified for lifting so I didn’t feel bad welding it.

Welding the parts together to make a new lifting frame for the plow


Side note about Timbren bump stops. These are awesome load carrying bumpstops. They are designed this way so when you put a pallet of mulch in the back of your pickup and bottom it out then the bump stops actually help carry the weight instead of just having a hard rubber stop. These are cheap at the junkyard but if you buy them new they are actually quite expensive. If you want you can check them out on Amazon HERE.
Fixing the blade angling system
The blade angling system on this plow consists of a pivot on the plow that is made from 2×2 tubing going through a piece of 2.5×2.5 receiver hitch tubing that I had cut windows in the side and drilled for a 3/4″ bolt. The screw rod was cut out of a broken trailer jack, but you could probably buy some beefy 3/4″ or 1″ allthread and nuts at the hardware store. Pretty simple. Again this was all made out of some tubing and broken stuff I had laying around the house.

I ended up cutting off both of the nuts I welded on the plow frame plus the bolts on each end of the adjusting rod (this was some hack I welded on in the cold after snapping it off while plowing a couple of years ago). I will be replacing these with a trailer hitch pin so that I can put the plow on THEN just drop the adjusting rod on and pin it with a hitch pin.

TIP: When cutting material in the chop saw that is too short, insert another piece of the same OD material in the other side of the clamp so you have something for the clamp to push against. Above I was trying to cut a hitch pin down so I inserted another hitch pin on the other side to keep everything tight and in line.
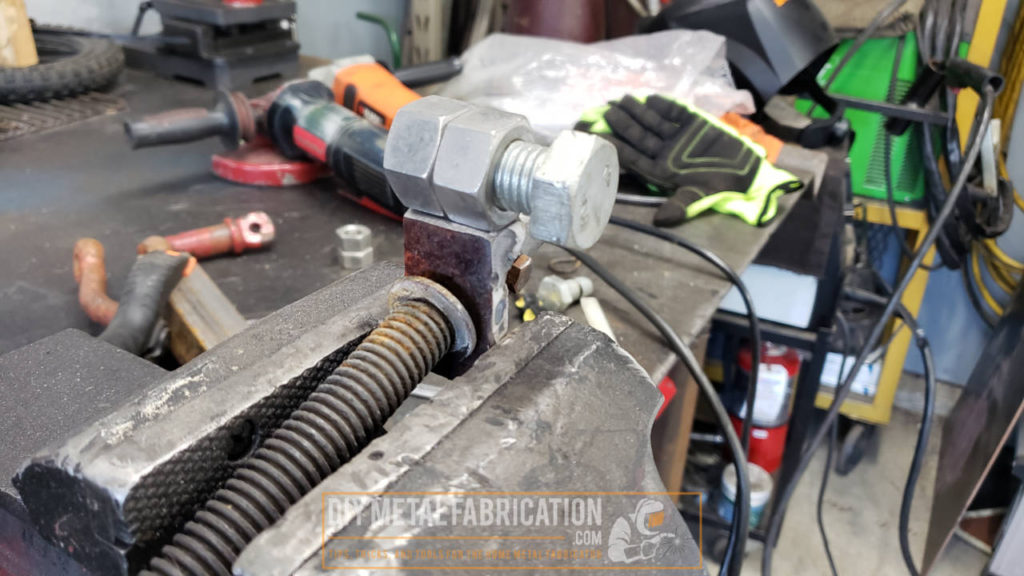
The large threaded rod and nut you see was harvested out of a common trailer jack many years ago. It is a little bent at this point but still works fine.


Plow Edge Guides / Markers

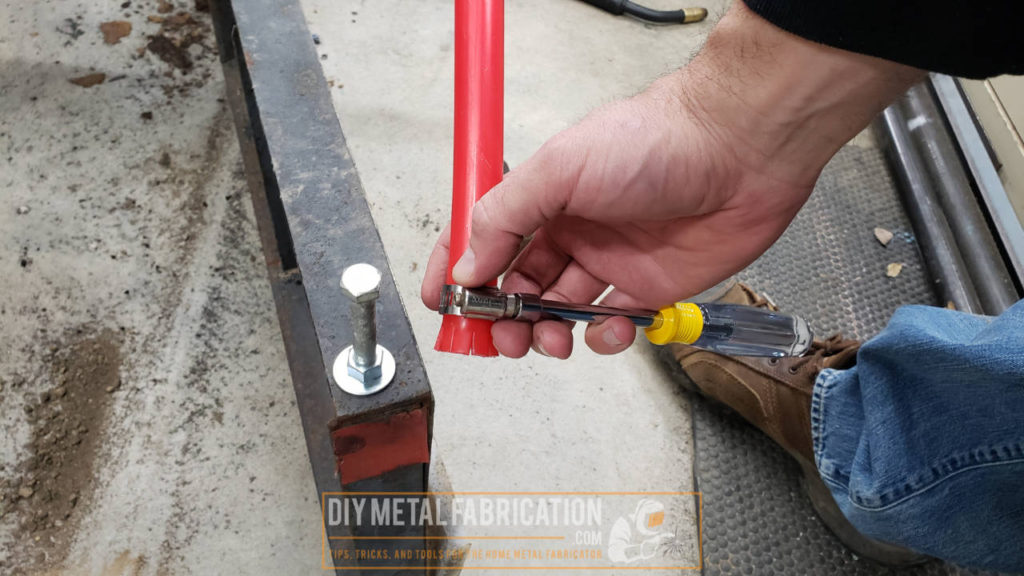


Yes the bump stop doesn’t like the angle but I didn’t want to weld the bracket on where it had to be oriented a certain way. These timbren style bump stops are quite squishy and pretty tough so it will be just fine. If I feel cute later I might fix it, idk 😛

Video
Here is a video of it going up and down and angling it with a battery powered drill with 3/8″ drive. I have a remote control winch so I can raise it up and down anywhere within about 20ft.
Finished pics outside!


This mod cost me pretty close to $0. I had already built the plow and used almost entirely scraps and supplies laying around the shop. A bit of ingenuity will goes a long way if you are willing to be flexible on design.
Things I didn’t expect and may or may not change in the future:
- This winch is WAY stronger than the crappy harbor freight atv winch I was using. I used to be able to hear the old one bog down but this one doesn’t at all. I am a little afraid of over-lifting and bending stuff even with the bump stop in place.
- I should have welded the bump stop on at an angle to match the angle of the lifting arm. Would be a quick fix, we’ll see if I actually do it or not.
- I don’t really like wearing on my synthetic rope. It should be fine for as little as I will use it but I might consider swapping the rope to something else during the winter or putting a small ATV winch back on like it used to have.
Alternatives?
If this is too much of a project for you you do still have some options but you will need a much bigger budget. Below is a link to a plow that goes into a 2″ receiver hitch and lifts up and down with a winch just like the one I built, except it is much fancier and it has a trip mechanism so it will flip down if you hit a curb with it.

Now YOU, go outside and build something! It doesn’t matter as much if it works or not. The important part is that you got off the couch and learned something.
Got a project in mind?
If you're tired of getting ignored by big shops or just want someone who actually gives a damn about the build, that's what I do.
Let's talk →
Brilliant.