Moving stuff in and starting to frame out the full bathroom! I share some valuable lessons that I learned while teaching myself how to frame a wall. I made some newbie mistakes, but I think it will work out in the end.
We left off Progress Report 11 with fresh concrete, a garage door, and a big pile of wood in the back of the van. At this point the builder is done. Everything else is up to me to finish such as finish grading, electrical, driveway, etc. which I am totally fine with. I like that the ‘pressure’ is off and I can take it at my own pace as long as I keep current with my building permit which just requires at least one inspection within 6 months of the last to stay open. For my city they can be open for up to 2 years before you have to apply for another one.
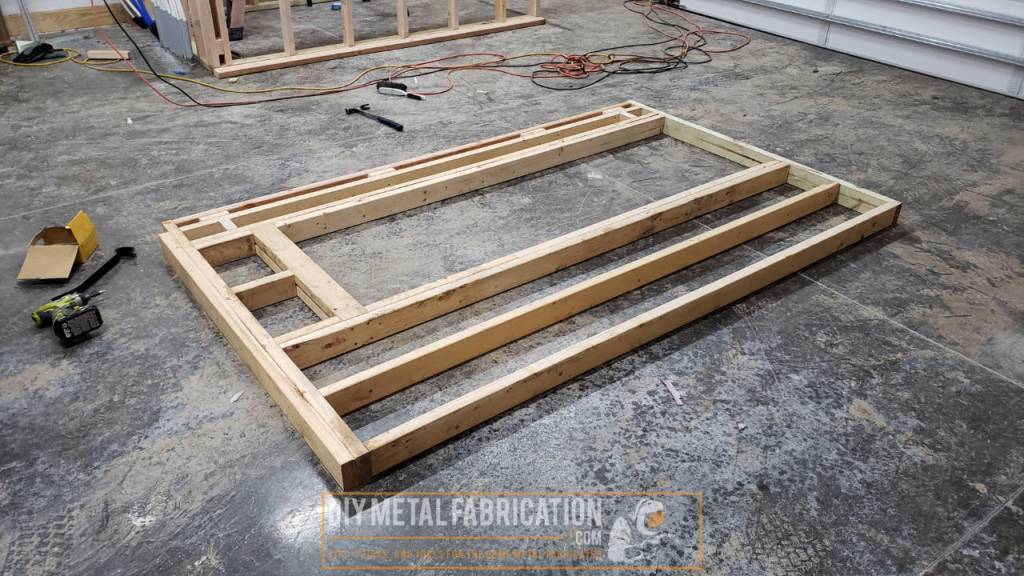
Framing for the Bathroom / Mezzanine
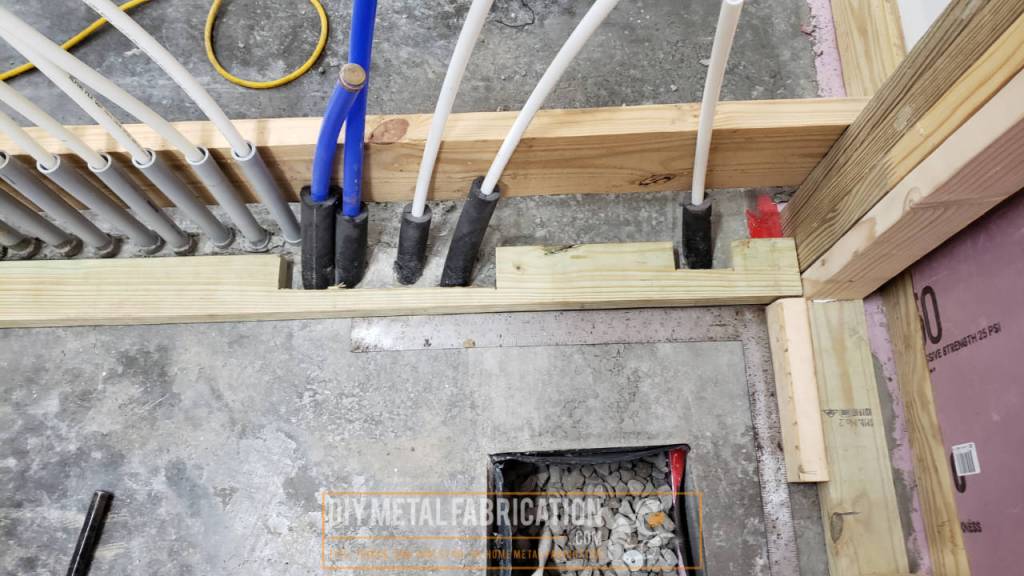
I had planned to have the bathroom in this spot since I had to put plumbing in prior to the concrete. There were some details I am going to figure out on the fly though as far as exact dimensions. I will go through some of it here as I went through the process.
The idea here is that I am going to frame it out just like I would if it was in a house. This will allow me to use standard plumbing, wiring, and drywall methods. Due to that design though, I will need to frame out all of the walls using 16″ on center 2×4 framing so it can be sheetrocked.
The journey is part of the reward for me, I love having to figure this stuff out and apply it as I go.


Hanging LED lights that won’t get blocked when the garage door is up
While the 4 lights I had hung were good, it wasn’t very bright towards the front of the shop so I decided to go ahead and hang two over where I was framing for the bathroom. This gave me a lot more light to work without having to use any annoying halogen lights.
I had been thinking for a long time about how I was going to light under the area where the garage door is when it is up since it is so big (18′ wide by 12′ high). After ordering some parts I think I came up with a solution that is both easy and works great.

4′ LED shop lights
I have now bought 6 total sets of these Hykolity 4′ LED lights and haven’t had a single failure yet after using the first set daily for multiple years now. As a bonus they are super lightweight and can be hung pretty much anywhere (even from a magnet)

Magnets for hanging the lights


Temporary driveway
Everything was a mess at this point and there was a 6″ lip to get up into the garage which was fine for PJ but not for my humble minivan ‘Pearl’. Growing tired of there being mud everywhere I went ahead and pushed the gravel up to the shop to make a temporary driveway. I will have to dig this all up eventually when I go to do my drainage and driveway.


More Framing

Material choice for finishing out the inside of the pole barn
Typical pole barn construction would just put stringers laterally on the inside then finish with metal sheeting just like it is on the outside. I was told the ceiling pieces come in long lengths and typically take a crew to put up. I don’t want metal sheeting and don’t have a crew to help me, so my plan is to do sheetrock.
Sheetrock can be purchased with extra fire rating and going with 5/8″ thickness should help dampen the large amount of noise I plan on making in here. This is probably overkill but while researching I found that some of the 5/8″ sheetrock has a 2 hour fire rating which sounds appealing (haven’t checked price yet though). One of the biggest concerns I have when I go to bed after working out in the shop (welding and other hot work) is that something catches on fire.
The framing will be similar to house construction with 16″ OC framing and fiberglass bat insulation. I am building my framing flush with the inside of the pole barn poles. Framing it this way will allow the sheetrock to be flush against the poles also which in turn makes the shop interior dimensions about 3″ larger since there aren’t stringers on the insides of the poles (every bit counts right?). I have some out of the box ideas in store for finishing the inside of the shop that only Google knows about at the moment (due to my random searches 😛 ).


Newbie mistake
As I said, I have never done any framing before. When I went to the hardware store, I bought the boards that said ‘STUD’ on them and assumed that they were the correct length. Well, turns out that the boards I bought were a full 8′ long and it doesn’t work that way because by the time you add a single board on the bottom and double header at the top your sheetrock isn’t big enough to cover it all. Therefore after calling my Dad, I learned that you have to cut the ‘STUD’ boards down to 92 5/8″.

BTW, my original walls are NOT coming down. I hammered those puppies into place and screwed them in already, they aren’t going anywhere. I will have to scab some boards in later so I have a spot to attach the sheetrock to.


I did time lapse some of it, I will need to put together a video one of these days.

Moving in some tools!
The attached garage was bursting at the seams and I needed to run conduit through the place where my tools were. The only logical next step was to go ahead and move them to the shop even though I wasn’t quite ready. Luckily I was able to borrow my neighbors tractor which turned out to be a huge help.


Thank you Bill and Dan for letting me steal your tractors. They were very helpful!!!!
Cool story bro…
This is one of those moments where I knew that my plan had gone flawlessly. I was ready to return one of the tractors the next morning but it was cold outside and already past dark. So I backed the van in and was able to hook on the trailer, drop the gate, and load the tractor all inside of the shop. Yes I am a spoiled princess, no I am not afraid to admit it 🙂


A note on DIY
I often have people ask me how I know how to do so much stuff. The answer is… I don’t, I just look it up when I need it. The secret is not having all of the answers, it is knowing where and how to look for them. For example, framing this bathroom started with a Google query of ‘Typical wall framing’ which led to ‘How do I frame a corner’ which led to reading something about a 3 stud corner that prompted the follow up question ‘How to frame a 3 stud corner’ etc. etc.
There are people all over the world that like to write about their specialty just like I do. It is to the point now that with enough research one can perform a task that used to be reserved for the ‘experts’ with an equal level of quality. Another recent example was from the concrete guy who poured the floor that said my radiant floor install was among the best he had ever seen. I had never done it before and had no expert help other than just researching the subject on the internet. Take your time, do lots of research, don’t cut corners, and you will end up with a great end result. If you don’t, you can always tuck your tail and call the experts in later to help you fix your boo boo. I chock those up to learning experiences.
Anyways, long story short… You don’t have to know everything, just Google it.

Conclusion
Thanks for taking this journey with me. I hope you learned something or at least got some ideas. Stay tuned for the next part where we will finish the framing on the bathroom and start laying conduit for running power and internet out to the shop.
Now YOU, go outside and work on something!
Got a project in mind?
If you're tired of getting ignored by big shops or just want someone who actually gives a damn about the build, that's what I do.
Let's talk →