Picture dump! Lots of progress and projects since the last update. This time we get electrical, trenching, drainage, and I drag a bunch of junk home from FB Marketplace!
This post will be more of a picture dump than anything. I really can’t cover all of the stuff that has happened since my last update in March or it would be a VERY long post. Here are some highlights to get caught up, hope you enjoy!
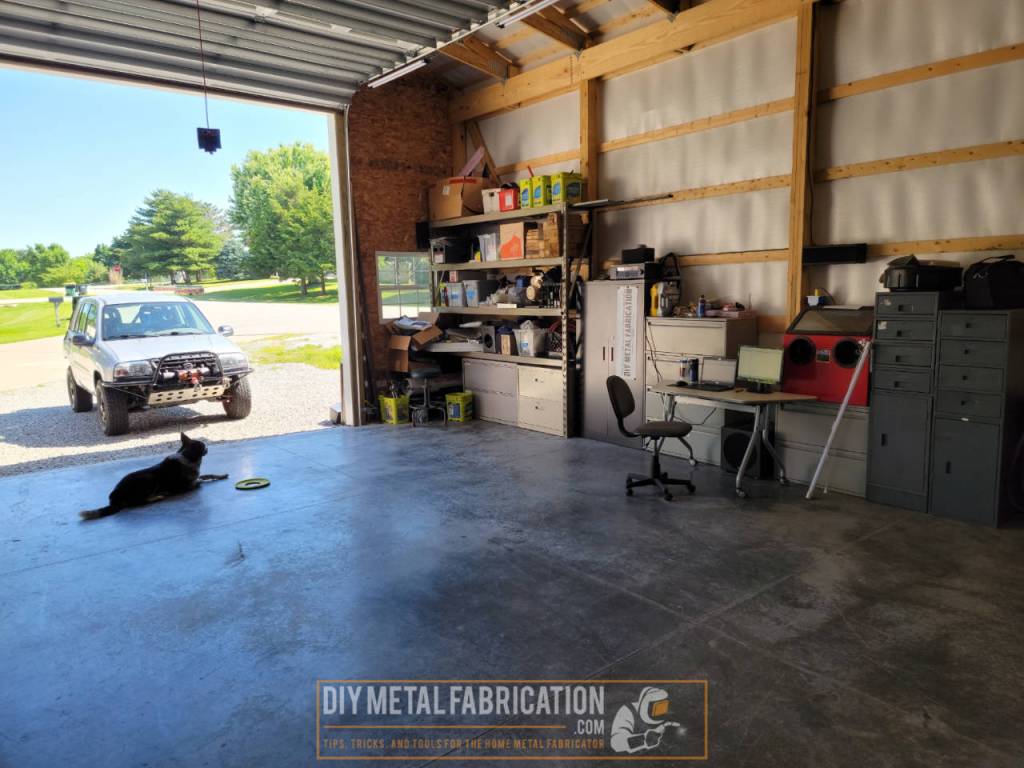
Doin’ work in the shop. It’s gotta earn its keep after all. Doing a front wheel bearing on wifey’s exploder. This sucker was STUCK, notice all of the hammers. I eventually had to go buy some grade 8 bolts to press against the spindle to get it out.Workin’ on projects and chipping away at the shop progress. Just thought this was a cool pic, no point to it really. Got a new camera er… I mean phone. Really it is better at being a camera than it is a phone (Not sure how T-mobile + Sprint can be worse than just Sprint was but it somehow is…)Look into the shop. More projects than time.freeeeeeeee tool storage. FB Marketplace.More freeeeee tool storage, this time from the side of the road.I now have more storage than tools. I used to think I had a lot of tools until building the shop, now it looks like a tiny collection.Also free from a garage sale (but broken)… Golden Tee ’99The neighbor came over and we replaced the flyback transformer in the arcade, but apparently I bought the wrong one because it didn’t end up working. Need to order another one but haven’t gotten around to it yet.Shipped out some jobs I did then cleaned house.Steadily filling up little by little.Need to get cracking on the bathroom framing again.Gertrude and I have been rather enjoying ourselves out there. See all my tool/stuff storage? I probably have less than $50 in all of those cabinets put together. Having a shop doesn’t have to be expensive.Electrician came by and ran some initial circuits for me. He had these cool wire standoffs that he used.
Just thought this was a funny picture. The electrician and his helper were knocking stuff out at the same time. This is one thing I’m glad I hired out.Welder outlet and a quadplex. Also, the line in the middle goes to a box on the outside for a future mini-split a/c heater.He wrote me up a diagram and my OCD printed out some labels 😀Motion sensing lights. I have said before I would never again have a garage without them. I set it up with two circuits, one for the front with the entryway light, and the lights to the sides of the garage door. The back circuit controls the other 12 lights towards the back of the shop.
I like having two circuits for lights. Since they have been set up, I generally keep the front circuit on auto and the back circuit off. During the day when I’m just getting something or parking, I don’t need all of the lights to turn on so this has been a pretty good setup so far. These switches are awesome because you can set the sensitivity and the duration that they remain on. I have them both set to the max of 30 min.
I just had him put 5 switched boxes on the ceiling to plug the lights in because the lights string together. One on each side of the garage door then the other three switched boxes on this truss. There is one non-switched outlet for the garage door opener that I am also running my Google wifi mesh on.Here is the shop fully lit up with all 16 lights plus the garage door opener lights on with two 100w equivalent LED’s. It is totally bright enough for me in there for any task.Replaced my welder gun. I had been doing a lot of cussing at my welder lately so it was time. Now that the new gun assembly is in there, welds like butter…BAM, in action pic (thanks John!) I take a lot of time lapse video but don’t post much of it. I need to get on that…My mini-jobsite. Rented a mini excavator to clean out the ditch on one side.Then started trenching next to the shop for my french drains.Got a total of 4 truckloads of dirt brought in.More borrowed tractor action. Thanks Dan!haha, like a bunch of micro-machines on this jobsite. We made it work pretty well though.Cool pic.East side dug! There was still a lot of hand digging I did after this though to get the right slope in my trenches. I am decent on an excavator but not good enough to catch the proper slope in one go.
Hope you enjoyed the updates. Next up is more drainage and prepping for the new driveway.
Now YOU, go outside and work on something!
Got a project in mind?
If you're tired of getting ignored by big shops or just want someone who actually gives a damn about the build, that's what I do.


What a nice shop you built.
Would love to hear how much it took to build it.
Thanks for sharing the journey !