Check out a step by step guide to rewiring a trailer end to end with new lights, wires, and a junction box. LOTS of pics included.
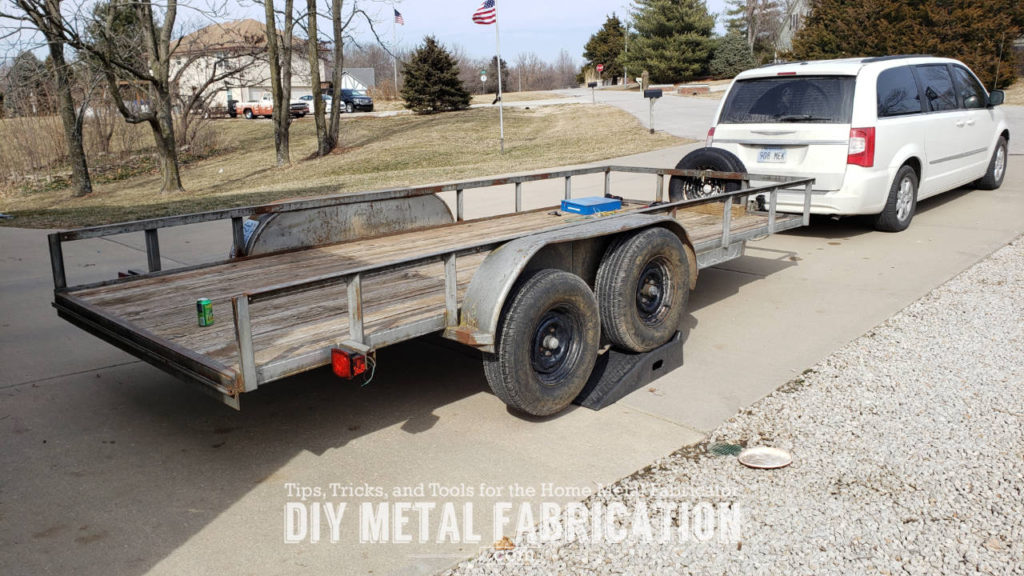
I semi-permanently borrowed my Dad’s trailer a couple of years ago and haven’t given it back to him since. Thanks Dad 😉 The problem is he got it when I was about 10 years old and the wiring is sketchy at best. It sat in a field for 10+ years and has been chewed on by mice and cows. I briefly tried to diagnose the lights before realizing how bad the wiring actually was. So began the project of rewiring the whole trailer end to end.
Parts needed
LED Light kit
I started by going to Amazon and grabbing a new LED light kit. This is literally all you need if your trailer doesn’t have brakes. Don’t mess with bulbs anymore, LED’s are just as cheap now and these things are BRIGHT!

Butt connectors
The above trailer light kit comes with a bag of t-splices and wire nuts… THROW THEM AWAY. Then go buy some real heat shrink butt connectors that won’t come apart at the most inopportune time possible. These are good to keep in the shop anyways because you will need them again.

Junction box with RV plug
If you trailer has brakes, I highly suggest you get a junction box like this. Feeding the wires into the tiny RV plug adapter and tightening all the screws sucks, this avoids all of that and gives you a professional looking adapter to plug into your truck.

TIP: Be sure to pay attention to the FUNCTION, not the color in the junction box. The RV plugs come with different color wires than what you would expect, but each terminal is labeled with the function which is helpful. Took me a minute to figure this out.
Tools needed
You really don’t need many tools to do this. A basic set of hand tools and wire cutters/crimpers should cover most of it. I got a little fancy and busted out my welder, but it wasn’t necessary.
I bought a new tool for this project that ended up saving A LOT of time. These strippers automatically grab the wire and strip off the insulation with one squeeze. There is an adjustable backstop to make it consistent if you like to strip off more or less of the insulation.

Remove the old wiring
I was cautious about this at first until I realized how messed up the existing wiring actually was and that there was no point in trying to diagnose it further. Most importantly the insulation on the wiring gets old and starts crumbling when you try to work with it. It just isn’t worth it.
This isn’t very complicated and you will be able to figure this out with a good diagram. Just grab your cutters and go after it!


Getting access
Safety first people. Put the trailer on a hard flat surface, hook it up to a vehicle and/or chock the tires so it doesn’t move, and make sure the wiring is disconnected from the tow vehicle before you cut any wires.


How do I wire the trailer brakes?
The trailer brake light kits don’t come with wires for brakes, so we are on our own for figuring this part out.
I think the reason the brake wire isn’t included is because it depends on your trailer setup. In my case it is a relatively short 16′ utility trailer with only one braking axle. If you have a super long RV with triple axles and brakes on each axle, you will need a heavier duty wire.
I ended up using 12 gauge wire which is plenty and probably a little overkill for my setup. 12 gauge should also be sufficient if you have two braking axles. However if you have a really long trailer, or it is heavy duty in some other way (7k lb axles, skid steer hauler, etc.), you should probably be on the safe side and use something closer to 10 gauge wire.
I found that Home Depot carries some 12/2 braided wire (don’t use solid or romex type house wiring in automotive applications) that is labeled as ‘Irrigation wiring’. It has a really tough insulation and is made for being buried, so I bet it will be acceptable here. It was ~.70 cents a foot when I bought it, so I was able to get out the door for around $15.
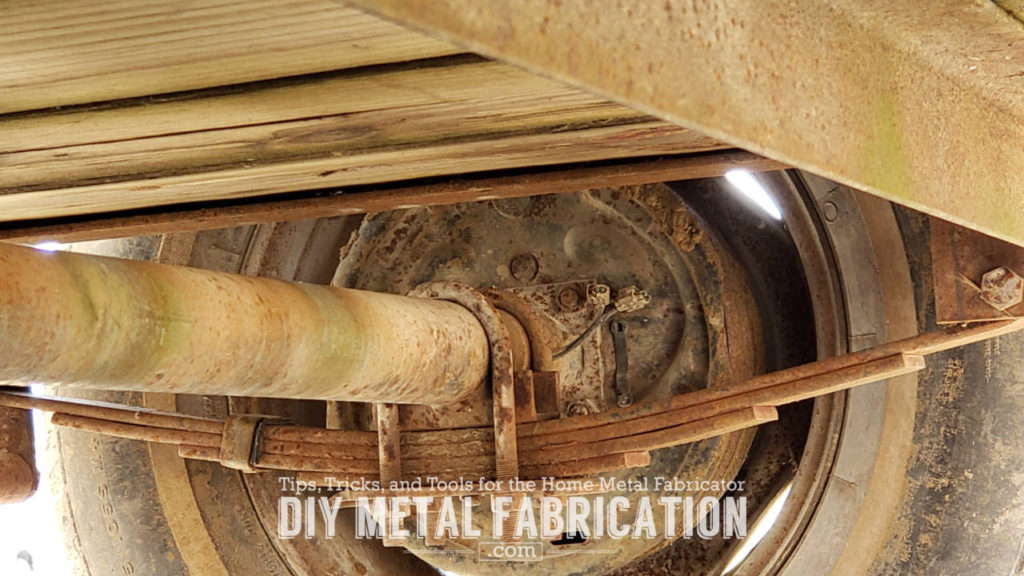
Most diagrams I found just had a 12 or 10 guage wire running to one terminal on the brake solenoid and the other side attached to the frame for ground. I went a little overkill and ran two 12 gauge wires to the brakes, one for power and the other for ground both of which were hooked into the junction box.
Mounting the junction box
I wanted this junction box to be secure, so I got fancy with it and busted out my welder. This is not necessary though. Find a non-load bearing piece of steel then drill a hole in it and either put a bolt through it or use a Nutsert.
Don’t know what a Nutsert is? Check out my other article: What is a RivetNut / Nutsert tool and how do I use it?


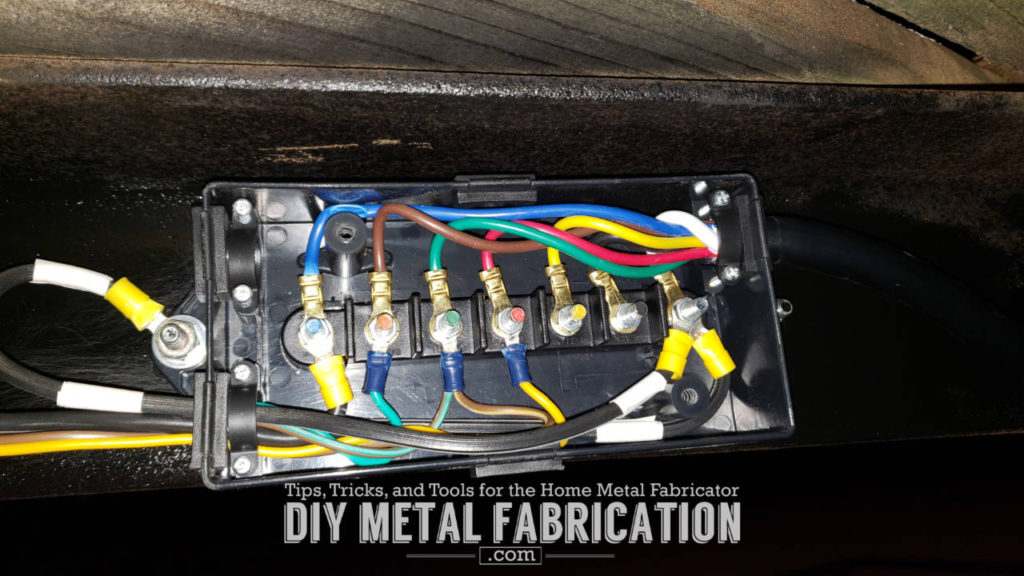


Yes… I know I told you to throw away all of the wire nuts and there is clearly two in my picture above. The wires coming off the solenoid were REALLY short and I was afraid to pull off the wire nuts that had been on there for years for fear of creating a lot more work for myself. I’ll put this on the future to do list when I have more motivation.
Ugh, t-splices…but they are still working so I’m not touching them until I have to.
Wiring Function/Color list

Notice the picture above a wire comes out and attaches to the stud, it is a black 12 gauge wire but I put some white electrical tape on it for future reference. This is to give the junction box a ground to the trailer. The box is plastic and wouldn’t ground otherwise, It is not good practice to rely on the ball to ground the trailer back to the vehicle ESPECIALLY on a trailer with brakes. Please properly ground your junction box.

Trailer Registration Holder
Here is a neat tip from when I used to be a fleet manager. Commercial trailers usually have a handy holder at the front to hold DOT and registration documents. These things are cheap and waterproof. A couple of self tapping screws and you never have to worry if you are driving the vehicle that has your trailer registration or not. This is especially useful if a lot of people borrow your trailer.


Conclusion


This is a job that is totally DIY-able. A little bit bit sweat and some new parts from Amazon you can save yourself a lot of money. Don’t be afraid of it.
Hope this helps you with your project. Now YOU, go outside and work on something!
Got a project in mind?
If you're tired of getting ignored by big shops or just want someone who actually gives a damn about the build, that's what I do.
Let's talk →
Brilliant article. Unfortunately on my last RV trip i didnt realise the electric hookup was dragging on the ground so for probably 50% of the journey I had no brake or indicator lights. Thankfully the actual brakes were still connected. I cut off the frayed section and added on a one foot section of new lead, colour to colour, 7 marettes on each side. My wife said it look like the corona virus. But it worked and got me home. I now have a new 8 foot lead to connect. I haven’t looked yet but I hope there is a junction box under the trailer/RV. Initially I was going to hook up colour to colour but you advised against this and I can see why but how do i test what each wire does? I am not on your level of expertise. Thanks for any help.
Sorry to hear that. Check out the table in this post where I listed out the common wire colors and their functions. You can hook up the wires without a junction box, I just suggest you make sure to use weatherproof butt connectors.