Cutting out complex shapes in sheetmetal is challenging. Luckily some specialty tools are available to help us out! Read more for details on sheetmetal nibblers, how they work, and full write-up with pictures of how to use them!
I have found throughout my various metal projects that it is hard to cut rounded or detailed shapes from sheetmetal. Grinding/cutting wheels are just overkill for small designs. Tin snips tend to bend the sheetmetal due to the scissor action and can’t make sharp turns (they will also wear you out if it is thicker sheet metal). A CNC plasma cutter or router would be an optimal solution but I don’t have one or the budget for one, so that isn’t an option either.
For the new year, I came up with a simple project so I could use the sheetmetal nibbling tool I bought on a whim about 6 months ago. Due to lack of a better idea, I decided to make a 2019 sign out of some scrap aluminum sheet metal and TIG weld it together.
I was hoping the sheetmetal nibbler would help when trying to cut letters, logos, and other detailed shapes. Turns out it does a pretty good job..
Creating Templates/Design
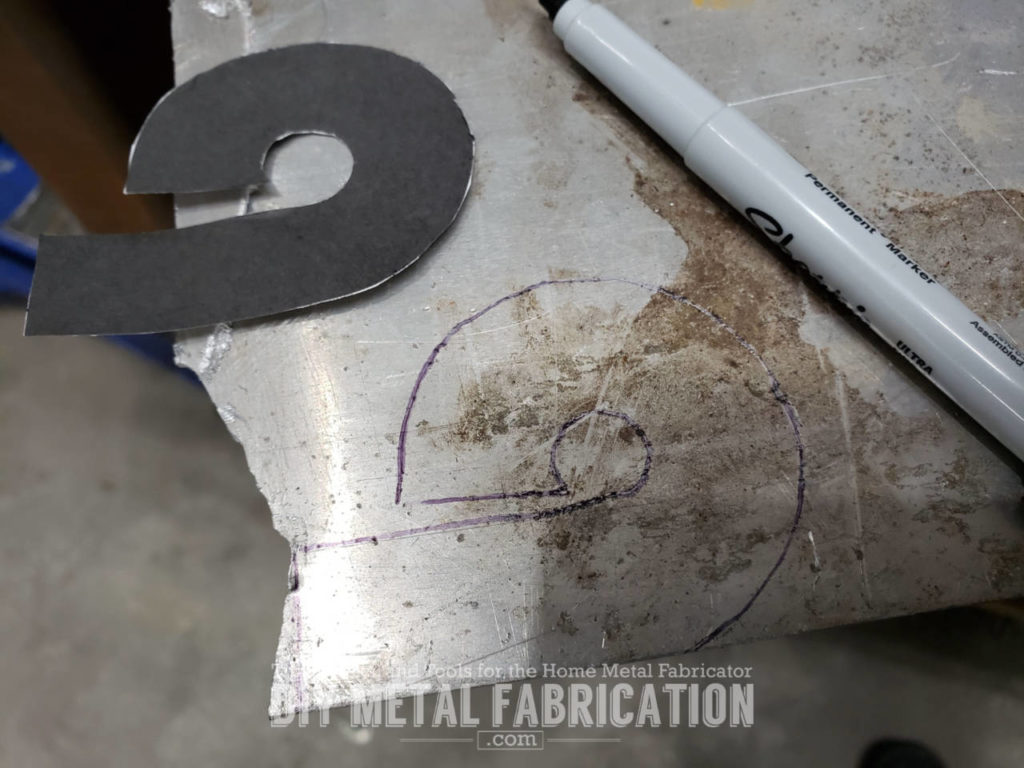
The first thing I did was print out a template for my sign. I just went into Word/Publisher on my computer and made some jumbo size 300 font numbers. If you notice below, the first one I printed on top looked hard to cut out so I went and changed the font to ‘Bauhaus 93’ which had less curves.
Tip: If you have a large design you can print one letter per page. If you need to go bigger than that you will have to find somebody with a plotter

Next I cut the pattern out with scissors and traced the numbers onto the aluminum sheetmetal.
About sheetmetal nibblers
These come in many flavors and you can pretty much spend as much as you want to (from $25 up to $300+). My general policy as a hobbyist is to start cheap then work my way up in tool/quality if I find I am either using it often or broke the cheap version. Therefore I started with the cheapest Amazon nibbler that I could find. They also make sheetmetal nibblers that have their own electric motor and ones powered by air (you better have a big air compressor though).
Below is a link to the one I bought if you want to read more about it. It uses any household drill as the power source which makes it much more affordable. I also liked it because it had dual heads and came with a nice case, spare die, and spare cutter blades.
The only immediate drawback I noticed the sheetmetal nibbler I bought is that it will only cut up to 2mm which is ~12 gauge (5/64″) aluminum. It worked great for the piece of scrap I found but I couldn’t use the thicker scrap that I had in mind because it wouldn’t fit in the throat of the nibbler.


Cutting sheetmetal with the nibbler
Now it was time for the sheetmetal nibbler to do it’s job!

The hand holding the bottom handle on the nibbler ‘stabilizes’ the cutting head and the hand holding the drill ‘steers’ the direction of the cut.
Tip: I found it was important to keep the nibbler/drill parallel to the work piece. When I got lazy or otherwise angled the drill too far up/down it would create binding between the sheetmetal and the head of the nibbler making it harder to turn.


Ready for TIG welding


I have all kinds of excuses for why my welds look so bad. You don’t want to hear, but I will tell you anyways. The cheap imported footpedal for my cheap imported TIG welder has never worked right and didn’t work this time either (I tried). So I was welding with AC voltage on pulse but because I wasn’t using the foot pedal I couldn’t adjust the amperage while I was going and got it too hot.


Time Lapse Video!
I have been wanting to play around with some video here on the site so let me know what you think. Here is my first stab at creating a timelapse video with a 50 cent garage sale tripod, old cell phone, and some random drone parts!!

2.5 Minute time lapse video. Don’t forget to subscribe to my YouTube channel for future videos!
Conclusion
Hope you all enjoyed the project and learned some stuff about sheetmetal nibblers in the process. Yes I know my TIG welds look like crap… that is the point! I am willing to embarrass myself here for the good of the order.
I’ve gotta get out in the garage more often and practice.
Now YOU! Get out in the shop and weld on something…anything!
Questions? Comments? Feedback on my super cheesy video? Post below!!
Got a project in mind?
If you're tired of getting ignored by big shops or just want someone who actually gives a damn about the build, that's what I do.
Let's talk →
Thanks for the great and informative post! – Not sure how others do their sheet metal fabrication like this, without a Nibler, but this a tool worth its weight in Gold!
Thanks again!
Kevin
Thanks for this post. Interesting information and great images.