Time to add more reinforcement and an aluminum skidplate to our custom DIY winch bumper build! We also discuss lot of tips and tricks along the way.
We left off part four with the start of a frame and reinforcement for the skid plate. Time to add a couple more pieces of angle iron and make the skid plate.
Finishing the skid plate frame

Side note. These projects take a lot of patience to get everything to fit together and look good. Everything for the most part is designed and created on the fly.
Here is my typical process:
Measure, measure again, cut, fit, cut, fit, sand a little, fit, then sand a little more, then a little more, then mumble ‘screw it, it is close enough’ and weld it together.


TIP: If you have a piece slightly off after you are done welding it on, a crescent wrench can work wonders for making small tweaks. Just close the jaws in and push or pull your piece back into alignment.


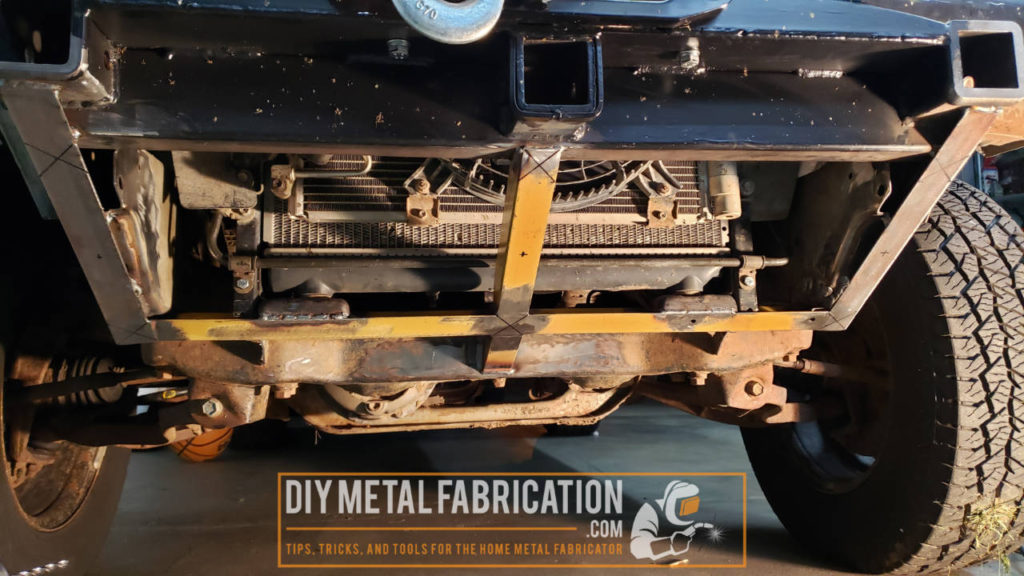
I forgot to take a picture from the back side, but the bottom yellow piece is welded on to the radiator mounts in multiple places underneath.
Drilling holes and inserting threads to bolt on the skid plate


Nutsert tools are SUPER HANDY to have in the shop for all kinds of projects. Seems like I have been using mine a lot since I started this build with PJ. Check out the one I have in the link below. If it is above your budget, Amazon has some cheaper versions also.


Making the aluminum skid plate
I will be making this skid plate from a scrap piece of 10 gauge aluminum I had laying around the shop. You will notice it has some random bonus holes already in it, no I don’t have plans on filling them in because I don’t care that much.
I was going to dimple die the large air holes but decided the metal was too thick and I didn’t feel comfortable trying it with borrowed dimple dies.
Drilling air holes for the radiator

I ended up using my biggest 2.5″ hole saw and doing 12 holes. In hindsight I might have been better off with a slightly smaller hole (maybe 2″ instead?) just so sticks and stuff couldn’t poke through. I wanted the holes to be big enough to let the radiator breathe since I stuck a giant winch in front of the upper part of the radiator.


Marking and drilling the mounting holes
I forgot to take a picture of the process for marking the locations for the mounting holes in the skid plate. If you remember from up above I had 9 holes drilled and nutserts inserted. Since this is all hand made, not everything is exactly symmetrical, it is close but not exact. So I have a process that works for me.
I threaded all 9 bolts into the nutserts on the truck making sure they all stuck out at about the same height. I then took some white lithium grease and dabbed it on each of the bolt heads. I lined the skid plate up with where its final location would be and pressed it up against the bolt heads. This left me 9 white grease spots on the skid plate. Next I took my transfer punch set and used it to center mark the 9 holes then drilled them out!
Finishing the aluminum


TIP: Put a nut on first before cutting bolts or allthread that way when you thread the nut off, it will straighten any threads at the end that you messed up while cutting.


Metal gauges are cheap and great to have around the shop.


Conclusion
Well, that ties up the winch mount and skid plate. The only things left are some tubes to form the rest of the bumper and hooking up a huge kill switch for the winch. Stay tuned for more!
Hope this was interesting and helpful. Now YOU, go outside and work on something!
Got a project in mind?
If you're tired of getting ignored by big shops or just want someone who actually gives a damn about the build, that's what I do.
Let's talk →
I like your style. I have a 2005 Grand Vitara that I’ve owned for about 15yrs. Was going to sell it then decided to make it into an overlander. I appreciate your sharing your project as I’m in the process of doing something similar. I am thinking that I want the hitch receiver on the front as it’s great for shunting things around the yard and I thought I would make my winch mount so it pins into it and the I could put it I the back if I needed too. Thanks again, keep up the good work.
Thanks for the feedback! Glad it is helpful.
The receiver in the front is handy.
For overlanding, the winch in receiver should work fine. If you are not doing hard-core offloading and just want to make sure you are prepared for a recovery. The only issue I have with the hitch mounted winches is that they stick out really far. I have seen some people weld an extra receiver tube somewhere in the back/trunk area to store the winch then only take it out when they need it.
I usually tend to need the extra clearance front and rear for offroad. The winch on the front of mine is halfway into the grille and almost touching the radiator. I got it as high and far back as possible. Approach and departure are a usually a non-issue for me offroad. With tiny tires and 4 doors my main issue is typically getting hung up on the belly 🤣 It is amazing what these little trucks can do since they are so light.