Check out this information packed article for my research, tubing layout, and a detailed list with links for all the parts I bought. I spent a LONG time researching all of the different things I needed to buy to install the radiant flooring myself in my pole barn before the concrete is poured.
My pole barn is scheduled to be delivered this week, so I figured it was a good time to get the initial parts list that I bought for my hydronic radiant heated floor documented in case it helps any of you. Here is the basic list of all of the things you need prior to pouring concrete. I will have to do a part 2 later when I buy the rest of the gear to finish it off and get it operational.

Disclaimer
These are all of the parts I bought for MY project. There are MANY points of view on the subject and you can read about it for days (I suggest you do your own additional research). What I did was read enough opinions to figure out what the standard recommendation was then I just did it.
There are so many variables from location to building type to moisture content of the soil that no armchair debate will solve your problems. Educate yourself, make a plan, and go with it.
1. Foam
Heated floors don’t work too well if the ground is sucking all of the heat out of your floor and into the dirt below. I am in Kansas so we aren’t too cold, I went with the standard recommendation which is 2″ XPS foam under the whole slab and around the edge as a thermal break. If you are south of me somewhere like Texas or Oklahoma, you might be able to get away with foam just around the edge then one 4′ wide strip under the outer edge of the slab. If you are north of me then tough luck, grab an extra fifth of whiskey or something to keep you warm 😛
XPS vs EPS
I did probably too much research on this and there is a lot of debate. The most consistent recommendation I came across was at least 2″ thick of closed cell XPS (eXtruded PolyStyrene) foam. XPS is smooth in appearance kind of tofu-like (but rigid).
The second runner up is 2″ thick of closed cell EPS (ExpandedPolyStyrene). It is from the same base material and comes in the same standard sizes but is manufactured differently. Because of the different type of manufacturing EPS looks similar to the styrofoam you find in retail packaging around appliances with little ‘balls’ of material.
The main debate is about moisture absorption and retention. It is said that the XPS is better at resisting moisture in all but the most extreme conditions. I’m not a scientist and don’t live in extreme conditions, so I just went with the main recommendation of 2″ XPS.
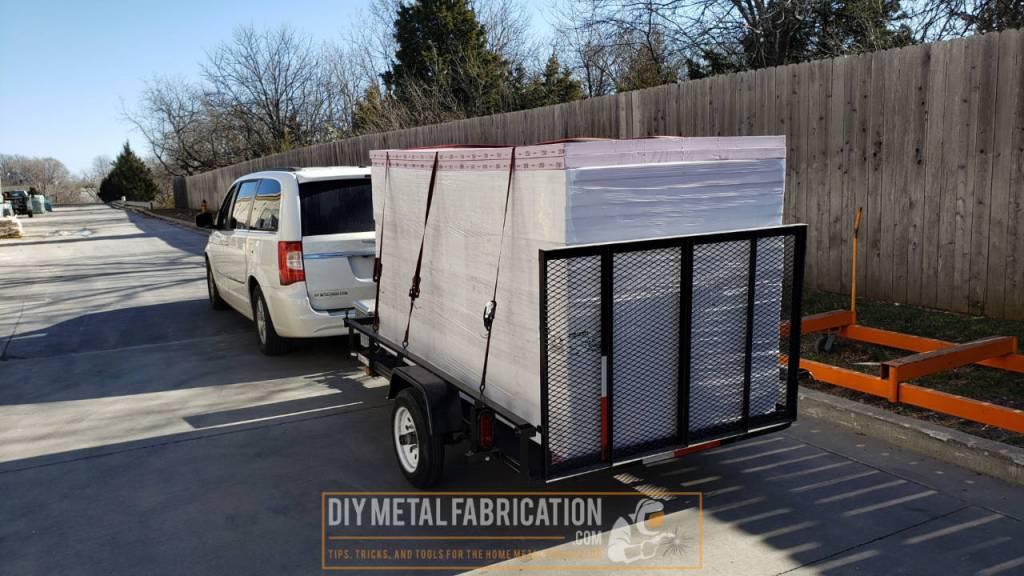
Where to buy XPS Foam Insulation
The most popular brand/type and what I ended up buying is Owens Corning Foamular 250 2″ thick that comes in 4′ x 8′ sheets. I checked prices at a handful of places and Home Depot was the cheapest because they have a bulk pricing discount after purchasing a certain quantity. As a bonus, since I got it at Home Depot where they keep it in stock, if I end up short I can just run and get some more.
Here are the calculations I used to find out approximately how many sheets I needed. I am doing the entire area under the slab then figuring ~1ft vertical around the edges.
- One 4 x 8 sheet = 32 sqft
- 30 ft x 48 ft building = 1,440 sqft
- 1,440 sqft / 32 sqft = 45 sheets under the slab
- 48 + 48 + 30 + 30 = 156′ around the perimeter of the slab 1′ high
- 156′ / 32 sqft = 4.875 (5 sheets)
- ~50 sheets total
2. Radiant Tubing
For in-slab installations of radiant tubing it is best practice to get PEX with an oxygen barrier. Per SharkBite.com “The oxygen diffusion barrier applied to the exterior limits oxygen permeation through the piping wall in hydronic heating applications which prevents corrosion of ferrous metal parts in the heating system.”
There are two different kinds of oxygen barrier PEX available that can do this, PEX-A and PEX-B. PEX-B is more common and cheaper but PEX-A (also called ‘ALPHA’) which is what I got has the same capabilities but is supposed to be much more flexible and easier to install (though it is a little bit more expensive).

For most pole barn type applications per my research you want to account 1 ft of PEX per 1ft of slab assuming the tubes are 12″ apart which is the recommended distance for 1/2″ tubing. For example my slab is 30 x 48 = 1,440 sq feet. I ordered five 300′ roles of PEX-A which comes out to 1,500 ft of tubing.
I bought 300′ rolls because that is the maximum recommended loop distance for 1/2″ line. Less thought is required when your tube is pre-cut to the proper length. If you are running the tubing and think you might come up short you can just head back to the manifold instead of trying to calculate how many feet you rolled out. The 1000′ roles are cheaper but I thought they might be unwieldy to work with.
PEX-A with Oxygen Barrier (more flexible, more expensive)

PEX-B with Oxygen Barrier (less flexible, less expensive)

LoopCad
Loopcad is a software package specifically designed for calculating radiant heat circuits and load. It is a little overkill for a project like a pole barn but after an hour or two of messing around with it I got what I needed.
I downloaded a LoopCad free 30 day trial and ran numbers using my inputs and came up with…(drumroll please)… just shy of 1,350ft of tubing. Therefore the rules of thumb above are pretty solid (I had some footings and stuff that reduced the area where I could put the pex). I will know more once I actually layout the tubing in real life.

I liked the loopcad outputs because it was able to auto-layout the tubing for me after selecting one of the 6 or so different layout types. It also told me my flow-rates for each circuit which will come in handy when I go to buy pumps and boilers.


I also flipped the loop around where the two post lift will be so the hot water comes under it first since that is presumably where I will be standing a lot.
Radiant Tubing Staples
There are a couple of different ways to attach the pex to the foam. I had multiple people ask my why I wasn’t using the green ‘CreteHeat’ that was designed for radiant tubing. The answer is… I would have if it wasn’t 3x more expensive than what I got. It also has a lower R value because the part where the tube sits is thinner than the pink stuff that I bought. You are welcome to check it out but I couldn’t justify the extra price since I will be doing the labor myself (with the help of some friends/family, maybe even the kids too!).

What I actually ended up getting was 800 of these foamboard staples. They have barbs on them that hook into the foamboard. Make sure you put plenty in and I have read that you should always make sure you do the apex of loop corners so they don’t float up when the concrete is poured.
They have a foamboard stapler (linked below) that inserts these but I took a risk and didn’t buy it because it is pretty expensive. Some of the reviews said that you can just put the staples in by hand which is what I plan on doing. I’ll tell you here in a couple of weeks if I regret not buying the stapler.


Radiant Manifold
There are A LOT of different ways to do the manifolds. I bought a stainless steel pre-built manifold for a couple of reasons.
1. I didn’t want to have to solder any copper pipes.
2. I wanted everything already put together.
3. I wanted to be able to adjust the flow rates per loop
I ordered the below manifold and I gotta say it is close to a work of art. The quality is very nice and it came with ‘almost’ all the parts to get it installed. They really aren’t that expensive for what you get. They can be ordered for anything from 2 loops to 12 loops. I ordered a 6 loop which gets me 5 loops for the shop and an extra loop for the bathroom (so I can fine tune it).
The white knobs are dials to control the flow and the red knobs with gauges at the top tell you how much flow is going through each circuit. It also came with valves for the main manifold with temperature gauges, fill ports, and air bleed valves.

Parts to Pressure Test

Once the pex in the slab and the manifold are assembled, you will need to pressure test the system PRIOR to pouring concrete. You also want to keep pressure (~50psi) in the system WHILE pouring the concrete. This way if somebody knicks a pipe with a shovel it will bubble in the concrete and you can fix it before it hardens.
Quick tip about pipe thread…
I was confused at the hardware store when looking for these parts. I’ll save you some time here. All of the parts / names / acronyms on this list should work with each other:
NPT = National Pipe Thread – This is the standard for pipe thread
FPT = FEMALE Pipe Thread – NPT standard female thread
MPT = MALE Pipe Thread – NPT standard male thread
FIP = Female Iron Pipe – NPT standard female thread
MIP = Male Iron Pipe – NPT standard male threadI feel dumb writing it out here but I was legitimately confused until I googled it. I knew what I was looking for but I was looking for ‘NPT male’ on the packages but they were labeled ‘MPT’ or ‘MIP’ and it took me a minute to connect the dots.
Pipe reducer
This is to reduce the pipe thread size from 1″ male to 3/4″ female for the below pressure test kit

Pipe Union
3/4″ male to 3/4″ male union makes it so you can attach the pressure test kit.

Pressure test kit
These handy little kits have a schraeder valve like a valve stem on a tire and a gauge. You can just add some air to fill up the system then leave pressure in it at least overnight to see if you have any leaks. I have heard many people like to leave the air pressure in it until they are ready to install the rest of the system. They have a 3/4″ female pipe thread connection.
I do NOT suggest doing a pressure test with water, it is too easy to not get it fully winterized or forget that there is water in the pipes and have them freeze up and crack on you before you get the shop up and running.

1″ Pipe plug
This is to plug the other side of the loop. Yes there is a valve next to the temperature gauges (red and blue handles in pics below) but… you never know. I would hate to spend time chasing down a leak only to find it was a spot where I was relying on a valve to be air tight because I didn’t want to buy an extra plug.


Thanks for taking this adventure with me!
This parts list is pretty much the minimum parts necessary to install prior to concrete. If I don’t do this part now then there is no going back once the concrete is poured. I can always add the rest as budget allows in the future.
This is as far as I have gotten on the radiant heating part until the building gets put up. Still lots more research to do on boilers, pumps and more!
Now YOU, get outside and work on something!
Got a project in mind?
If you're tired of getting ignored by big shops or just want someone who actually gives a damn about the build, that's what I do.
Let's talk →