Another common problem with the Vitara and Trackers is the aluminum pinion mount on the front differential breaking off which then allows the differential to twist up and bash into the oil pan when in 4wd and reverse.
My Vitara was no exception, the mount had broken and the oil pan was already dented. I needed a solution that was simple, cheap, and tough.
Unfortunately when I was pulling the diff out, I realized that the third mount up by the pinion was broken off. Here is the fix
Repair options
Find a differential from a newer model XL7/Grand Vitara 5 speed made from steel (needle in a haystack)
Replace the differential with the same aluminum one but not broken (really doesn’t help because I would just break it again)
Come up with a custom solution and fix it myself
I had already taken the front end apart to fix (permanently weld) the 4wd actuator engaged in the front differential. Read more about that HERE. So here I am fixing the pinion mount while it is already taken apart.
Parts/Tools list
Parts: 1/2″ or 5/8″ diameter 4″ ID Round U-bolt w/ nuts 1/2″ or 5/8″ jam nuts (for extra safety on the u-bolt) ~2ft of 7″ wide baler belt (available at most tractor supply stores)
Tools (in addition to those needed to remove the diff): Various drill bits and step bits 1.5″ hole saw drill bit Angle Grinder (I prefer 4.5″) Drill Vice (handy but not necessary) Misc garage tools – Utility Knife, Board, Straight edge, etc.
First step was to cut the rest of the broken mount off. Be sure not to cut too deep and get into the actual housing. My Lenox MetalMax 4.5″ diamond cutoff wheel makes me happy because it just works.This is what it looked like after the initial cut with the diamond cutoff wheel. You can see I wrapped the diff with rags to keep the metal shavings out.Next step was using a 4.5″ grinding wheel. I lubed it with the ‘Lube Tube’. It is supposed to keep aluminum from gunking up your grinding wheels, seemed to do pretty good.Then the final grind for smoothness with a 4.5″ flap/sanding wheel.
Starting to build the new mount
Pinion housing diameter measurement after cutting the bracket off 3.458″Pinion housing diameter measurement after cutting the bracket off. This is up closer to the pinion nut though where there is a casting ridge 3.566″Next stop was the tractor supply store and I ‘almost’ got what I needed. 3ft of ‘baler belting’ and a 5/8 x 3.5″ ID U-bolt.
What I really needed though was a u-bolt with a 4″ Inside Diameter. I am impatient though and it was the weekend so I made my own.
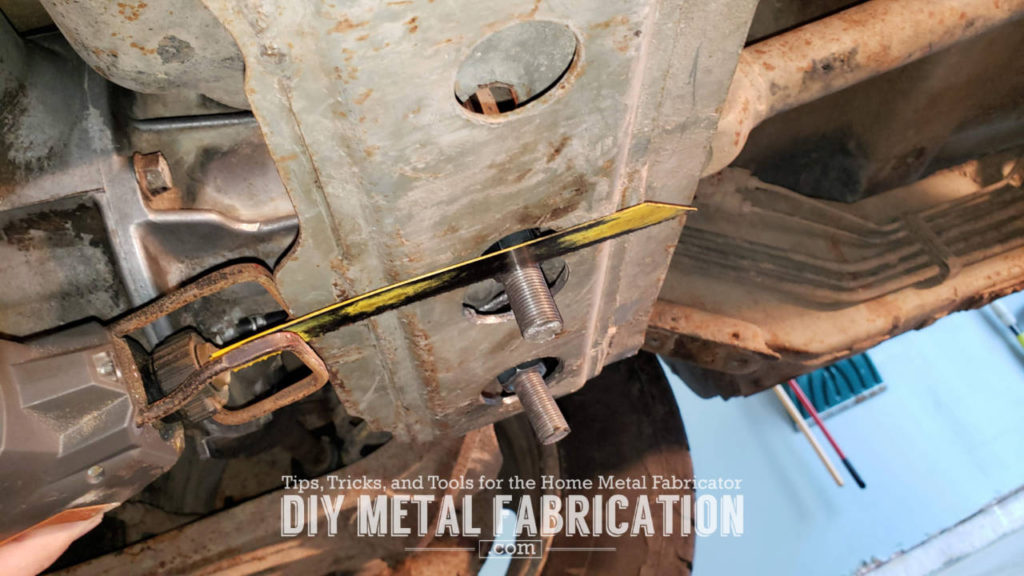
Here is a tip: if you have a small part to grind, please clamp them in channel locks or something similar. This will keep your fingers away from any spinning wheels while you are grinding/cutting/shaping parts.Added 1/2″ by cutting the head off a random bolt then cut out 1/2″ long of the shank. Lined it all up on the welding table with some magnets.Good enough for me! The only regret here is that it is now a semi-round, not round u-bolt which later on didn’t help my clearance situation (keep reading).I cut a couple of pieces of baler belting ~1.5″ wide by 7″ long and stuck them up under the diff just to see if everything lined up. I ended up using 2 layers under the diff in the end product (instead of the 3 seen here).Cutting the baler belt is pretty straight forward. A board, utility knife, and straight edge gets the job done.The baler belt is just shy of 3/16″ thick at .186″.With the u-bolt hung over the pinion like in the pic above I eye-balled where the holes in the crossmember should be for the u-bolt. I then chose an 1.5″ hole saw (big enough for the large 15/16″ nut and associated socket). and drilled through just the bottom of the crossmember. This is just to the right of the factory bushing bolt hole.I then drilled another 1.5″ hole toward the right (passenger) side where the u-bolt would come down. After drilling through the bottom half of the crossmember it was time to drill some slightly oversized 5/8″ holes for the u-bolt to go through. Lots of test fitting to make the holes only as big as they needed to be.
The passenger side hole towards the right in the pic above is tricky to drill because it is curved upwards. Be sure to use a pilot hole and drill up in steps to get the hole exactly where you want it. Toward the end I ended up using a step drill bit until it got to the size I needed.
With the tight clearances in there, I couldn’t actually get the U-bolt in the holes to test it because it was hitting the oil pan. At this point it was way late in the night so I resorted to hack-sawing the tails of the bolts off so as to not wake up the whole family. This would have been way easier with a sawzall or grinder.
TIP: When cutting any threaded bolt, allthread or the like, always screw a nut on ABOVE where you are going to cut it. That way when you spin the nut off it will fix the threads from where you cut it.
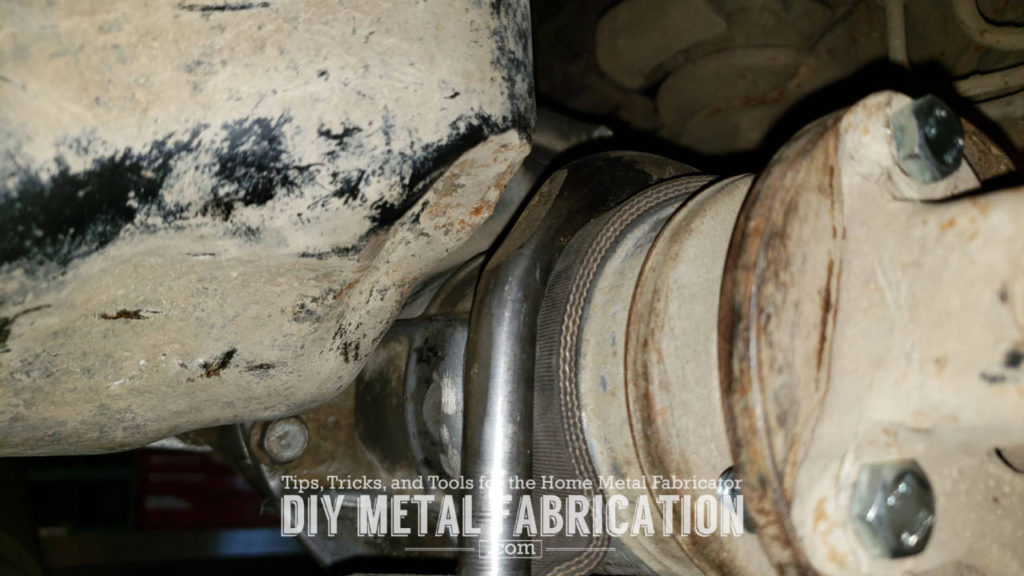
Once cutting off the long tails of the u-bolt I noticed that it also needed tweaked a bit to fit around the oil pan. The slight kick forward on the left hand side let it go into the hole without the U-part hitting the oil pan. To do this just slide a pipe over the side not in the vice and tweak it in small increments until it works for what you need.Test fitting. This was the disadvantage of me widening the u-bolt instead of buying a round u-bolt with the correct ID (4″). The edges were a little more square and it was pretty close to the oil pan.
Side note: As you can see above, my oil pan is already dented from the rear pinion mount being broken for who knows how long. Not sure what the original un-dented pan looks like or if this mod would work on one that wasn’t dented. I suppose you could also go to a smaller u-bolt diameter if you needed more clearance, 5/8″ is definitely overkill.
Some additional clearancing on the part close to the oil pan…That looks better.About a finger width between the u-bolt and oil pan. I have done some actual offroad testing since this and it has not been an issue.For the right (passenger) side where I note above that the crossmember curves up, I built a spacer/washer that matched the curve so I could tighten up the u-bolt without the washers being at an angle. Probably overkill but it made me feel good about it.
Reinstalling the differential
I put the passenger side CV in before installing the differential. In hindsight this was probably a bad idea and I think it would have been easier to install the diff without the CV in there. I didn’t want to risk removing it and breaking another clip so I just worked around it.Since the passenger side axle was already installed in the diff, I had to remove everything (strut, lower control arm) from the knuckle except the tie rod, insert the diff in the truck and shaft in the knuckle then reinstall the knuckle. Not fun by myself but I got it done.Once bolting the diff back in and knuckle on, time to tighten up our new u-bolt mount. Then bolt on the driveshaft. Ratcheting wrenches are a lifesaver here.Photo of the new mount. Pretty simple huh?Since I plan on beating the tar out of this truck, I picked up some 5/8″ jam nuts from the hardware store then tightened them up against the u-bolt nuts. This will keep them from backing off.This is an offroad truck so I can’t have extra u-bolt killing my ground clearance. I used a sawzall to cut the ends of the u-bolts flush with the bottom of the crossmember.Done. No loss in ground clearance.Don’t forget to fill the front diff with fluid! (I am wearing sandals because I had let the RTV sealing the diff dry overnight and this was the very last thing to do before Sam and I could go play around on a small trail close to the house. NOT standard work attire).Boom, victory tastes sweet. Did some pretty decent tests of 4wd in reverse and everything seemed pretty solid! Nothing moved and no weird noises.
Resources
http://www2.izook.com/pinion-mount/ Pictures of an alternate pinion mount that retains the factory bushing mount yet still surrounds the snout of the pinion and adds another bushing on the passenger side.
I thought about this mod for a while before I executed on it. I think I came up with just about the simplest fix possible. It is literally a couple of pieces of rubber and a u-bolt with some strategic hole drilling and massaging. This is a totally custom mod though so while I line out the plan, you should expect some head scratching and actually need to have some tools/skills to execute on it.
If I would have replaced the diff, I would have retained the same weakness. With this mod I actually made the rear mount stronger and more reliable with very little money invested.
Hope this helps your project. Now YOU go to the garage and fix something!
Got a project in mind?
If you're tired of getting ignored by big shops or just want someone who actually gives a damn about the build, that's what I do.