Read more to see how I built an interior roll cage for my Suzuki Vitara. What started out as a gas tank relocation project got out of hand in a hurry!
This is a classic example of having a project snowball. So I already had the back end of ‘PJ’ my suzuki Vitara torn apart for my Gas Tank Relocation Project. While I was in there I realized that I had a clear shot at the frame to weld in a roll cage.
This first section won’t be a full roll cage, more of a roll bar for the time being. I have future plans convert it into some kind of full inner/exo/roof rack roll cage. Still thinking about what I eventually want, but for now I at least wanted some extra support in the back where my kids are sitting.
Getting access to build the roll cage
Here is the starting point. I had already cut a hole and put in crossmembers, it was essentially ready for me to mount the gas tank back in.
While I was staring at the giant hole I had cut for the gas tank project, I realized that if I widened it up just another 4″ or so, I had direct access to the frame rail to weld the roll cage to. The body on these trucks are really thin sheetmetal, so if at all possible you want to attach to the frame.
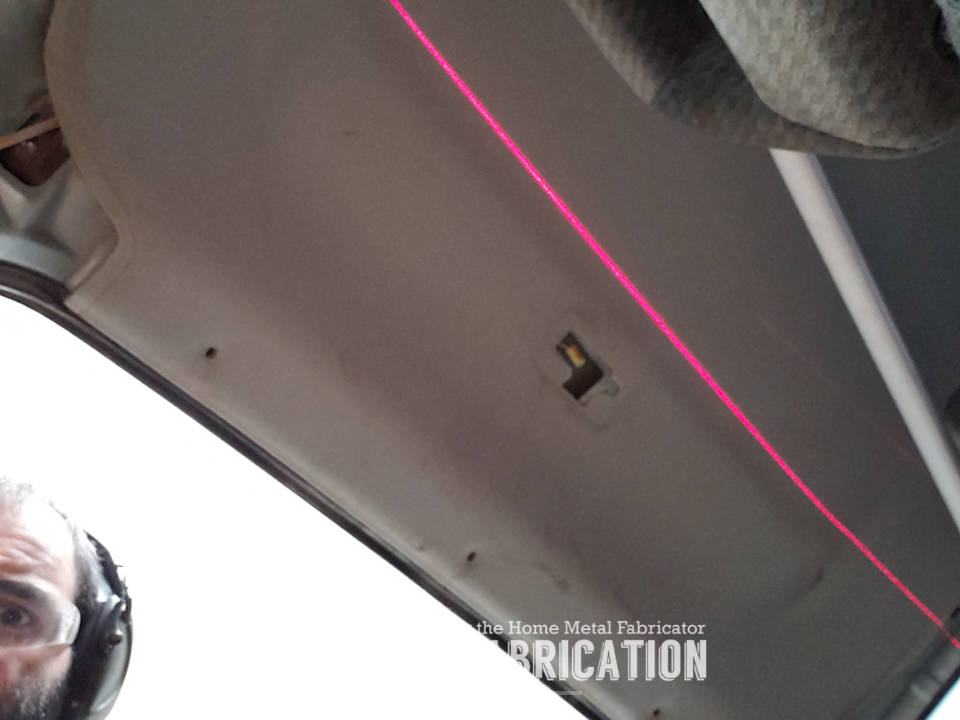
Opened the hole up a little bigger. The roll cage tubes now have a straight shot to the frame.My pile of stripped off parts keeps getting larger. Weight reduction right?Threw a laser level on the roof so I could trace a straight line. I used a utility knife to cut off the headliner from the line to the back of the vehicle. Even though it is a beater vehicle, it doesn’t have to look like one.
Tube Bending
Below is a link to a Pirate 4×4 article called Tube Bending 101 by Rob Park. He does a much better job of explaining the bending process than I do. I have been referring back to this guide for years.
This initial bend is so we can determine the bend starting point. Once we have done this, we can mark the bender and have reliable bends going forward.
After bending the 90, I removed it and found the ‘bump’ on the inside of the bend where the bend started and marked it. I then put it back in my bender and notched my die with a grinder (Pen would work but tends to rub off over time)
Next I spent some time with a tape measure in the back of PJ to get my dimensions. Basically the width of the framerails and the height of the inside of the cab. I then drew out my area on a clean portion of the shop floor in soapstone (so it could be erased). I made sure it was square and I labeled it with dimensions so I didn’t have to rely on memory.
Use the proof bend to mark the starting points of your bends.Now we can mark the starting point of both bends on our roll bar hoop.Chuck it in the bender with the start of the bend mark lined up with the mark on the bender die. If using HREW tubing, put the seam towards the inside.Bending to the desired angle. Here we are just going for a 90* bend.
Notice I had a can of chain and cable fluid spray sitting on the bender. It is important to clean your tubing before bending and liberally lube the follower die as you are bending so it doesn’t score it. Once your follower die is scored/scratched it will start scratching the tubing on your future bends.
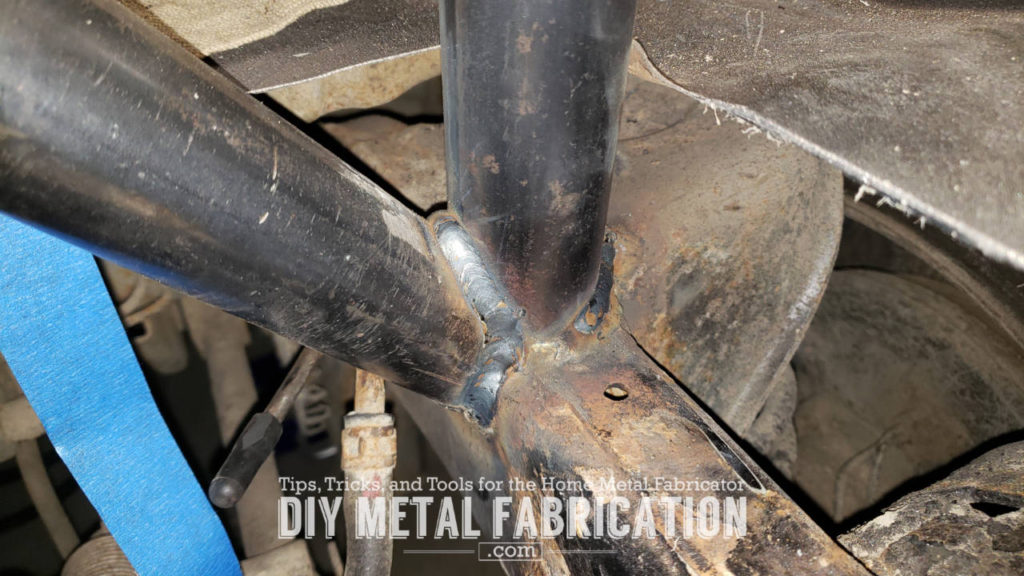
Now I can lay it back on my ‘layout table’ aka floor to check the bend and make sure the marks for the other bend are still in the right place.Close up of the bend inside of my marks.Now we flip the tube over and chuck it in the bender for the second bend. When doing any subsequent bend, make sure the tubes are ‘level’ and in the same plane using a level or degree finder.It was a little tricky to line up my marks on the second bend since I didn’t have anybody helping me. I ended up having to peek under the bender arm to make sure my marks lined up.Second bend completed.When I get down on the level of the tube I should not be able to see the tubes go up or down. This is why we checked to make sure the tube was level and in the same plane before making the second bend.Putting the tube back on my layout. Came out pretty good. I overbent the left side by a degree or two which is ok. While I had it laid out here, I marked and cut the two open ends (leaving about 1″ extra for safety margin) so I could start test fitting it in the truck.After some in and out and additional trimming, I bungee corded the hoop to the seats so I could weld the hoop to the frame.Notice the old license plates which are great and bend into place easily for protecting parts you don’t want weld spatter getting on.Measuring for the cross bar.Cross bar cut and mocked up.Pic of the frame end. I just used an angle grinder to cut this in.The hoop was just a tad out of square. Not a big deal. I just threw a ratchet strap on the high side of the hoop and tightened it up until everything was square before welding in the cross brace.Here is a pic of the notch on the hoop side. Again, I just cut this with an angle grinder. I have a tube notcher but it would have taken longer to get it out and set up than it did to just cut this by hand real quick.Here is a pic of the node at the frame all welded up. Some of the spots were hard to get my MIG gun into. Not perfect, but good enough for me!
Conclusion
Thanks for reading! Stay tuned for Part 2 where we put in the other cross brace and add some additional support tubes kicking out to the rear. Then we can put the tank in and start closing up the giant hole in the floor.
Now YOU, go out and build something!
Got a project in mind?
If you're tired of getting ignored by big shops or just want someone who actually gives a damn about the build, that's what I do.