A fun little project I just completed was reinforcing a Members Mark brand 4 burner griddle to prevent future warpage. The more expensive BlackStone griddles already have this reinforcement. Money saved with same end result = Winning.
TL;DR
Too Long; Didn’t Read (Wifey just taught me about this so I am excited to try out a summary for you folks that just like pretty pictures)
- Member’s Mark griddle, made cheaper no reinforcement under griddle surface.
- Concerns about warpage.
- Bought angle iron, cut, welded on
- Party on, saved ~$50+
- Stir fry
Brand preference
If you are reading this then you likely either already bought a propane griddle or are thinking about buying one. There are differences in pricing and features and typically the price reflects it. This is an experiment in buying the cheaper product and upgrading it yourself to make it like the more expensive product. Is it worth it? guess we will see…
Today we are talking about griddles, but really the principle applies to all products. If a product has an Achilles heel the manufacturer has not addressed (or doesn’t plan on addressing) but you have the tools to fix it, just save some money and do it yourself!
Blackstone 4 Burner Griddle
This is the more expensive ‘cream of the crop’ best griddle you can buy. These already come reinforced with angle iron from the factory. Check it out and read the reviews so you are prepared in case you ever find yourself in Sam’s staring at the cheaper Members Mark model.


Here is a link to a forum post discussing the reinforcement on one of the smaller 17″ BlackStone Griddles that I am loosely basing my reinforcement on:
https://eggheadforum.com/discussion/1204938/help-17-blackstone-burner-problem/p3
Members Mark 4 Burner Griddle
This is the cheaper Members Mark grill available at any Sam’s Club. There is about a $75 difference between this model and the Blackstone as of this writing.
I am by NO means saying this griddle will inevitably warp without reinforcement. This project is because reviews and forums for other similar versions of griddles have warped and the premium brand reinforces theirs which means it is likely that warpage is a common issue.
https://www.samsclub.com/p/members-mark-outdoor-gas-griddle/prod22750694
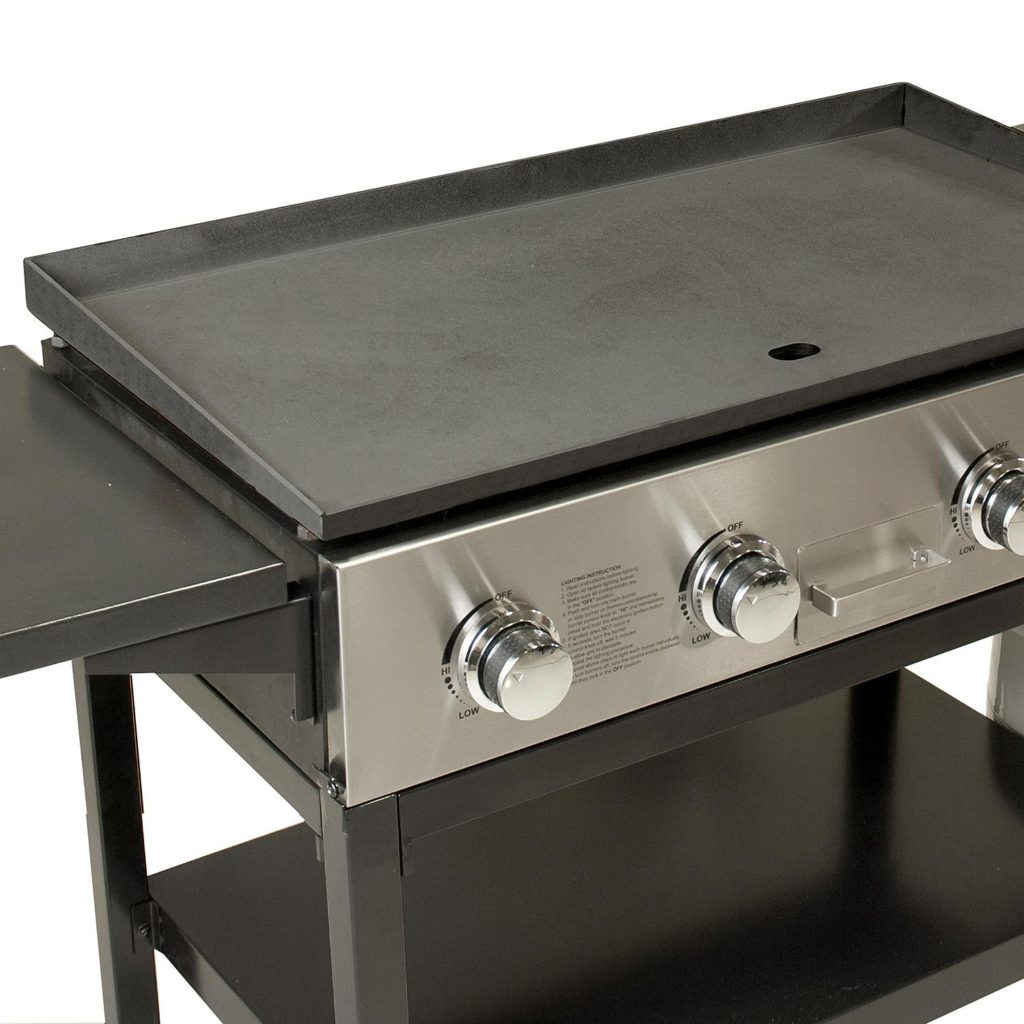
Members Mark Griddle Top – Analysis


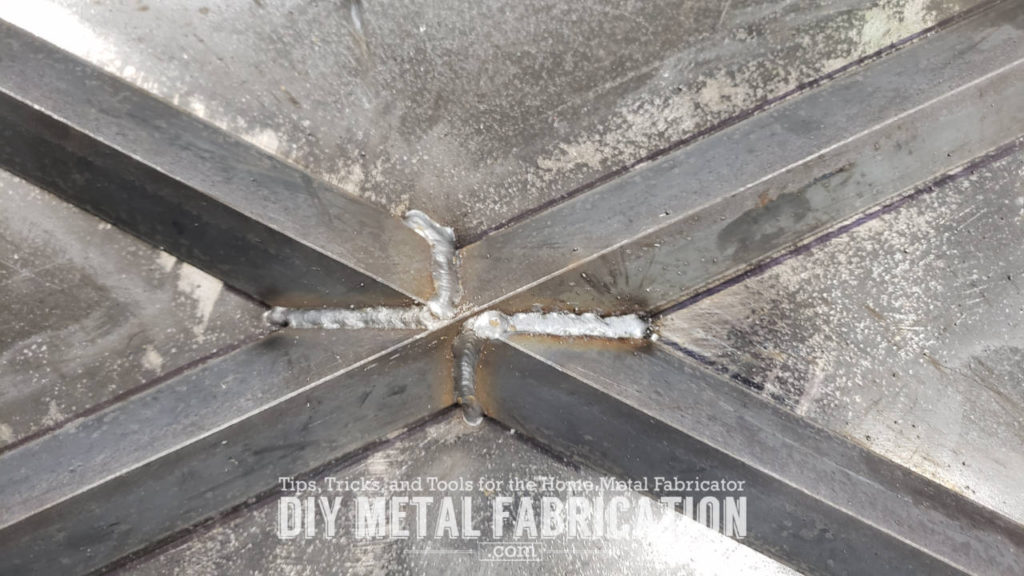
Adding Angle Iron Reinforcement

Side note: I finally had to change out my 1st diamond cutoff wheel after MONTHS of usage and now am using another one. I swear I will never go back to fiber cutoff disks.

I decided to get ‘fancy’ and do an X. This was extra work and probably unnecessary but seemed like a good idea at the time. As you can see in the review pic at the beginning, the Blackstone units just use three straight cross braces. It is not likely they would ever do an X or anything that overlapped due to additional manufacturing costs.


TIP: For marking the cuts. When looking directly down from above, I marked a straight line where the peak of the angle iron was, then marked where the bottom of the angle iron was. I then connected my lines which showed me the angled line of where to cut.


Stir Fry

Conclusion
So the question is, Do I buy the cheaper product and upgrade the weak points or do I just whip out my checkbook and buy the ‘best’ product of every category?
The answer is really ‘it depends’. Depends on your skills, how much you like working on things, and how much time you have. If you have a welder, enjoy projects and have time for them, Great! If not then congratulations, I am surprised you read this far on a DIY Metal Fabrication post ;-)
Hope this helps! Now YOU, go work on something!
Got a project in mind?
If you're tired of getting ignored by big shops or just want someone who actually gives a damn about the build, that's what I do.
Let's talk →
Ooo……. awesome article. The images are so much detailed. Every portion of the product is visible. Surely this information is gonna solve all of my problems. My confusion about this products is fully cleared today. Thanks a lot for sharing this awesome article. Helped me a lot.
Awesome article! Thank you much for posting so many details on how you solved this. I just bought this griddle from Samsclub, and I’ve been reading about all of the warpage complaints on it.
I’m curious about one detail though. Did you need to do any preheating of the top in order to prevent any warpage while you welded the angle iron to it?