I got a 2015 Ford Expedition EL about 6 months ago. I absolutely love it but ever since I got it, I have had nowhere to put my tools that I usually carry with me. Most of the solutions I found were either really expensive or not practical for what I wanted. Read more to see what I came up with.
I was spoiled by my 2011 Chrysler Town & Country that I sold when I got the Expedition. It had storage EVERYWHERE. The compartments that were huge and super convenient were the ones where the middle row of seats fold down into the floor. Those compartments are where I kept my receiver hitches, socket set, disk golf discs and a bunch of other stuff for emergencies. I hardly ever folded the middle row of seats, so it worked out great.
The expedition however only has a small plastic tray in the back with an awkward divider thing and a teeny bit of space to shove some small things around the jack in the back. It wasn’t enough. I quickly got tired of my socket set sliding around in the back and the concern that if I got in a wreck I was going to get hit in the head with a loose receiver hitch and ball that was also rolling around back there.
I did some research into drawer units, but they are REALLY expensive and overkill for what I am trying to do.

I grabbed one of my free/leftover filing cabinets with the thought of building my own drawer system (this is DIY Metal Fabrication after all). The drawer rails and drawers (once cut down to size) would have worked perfectly.
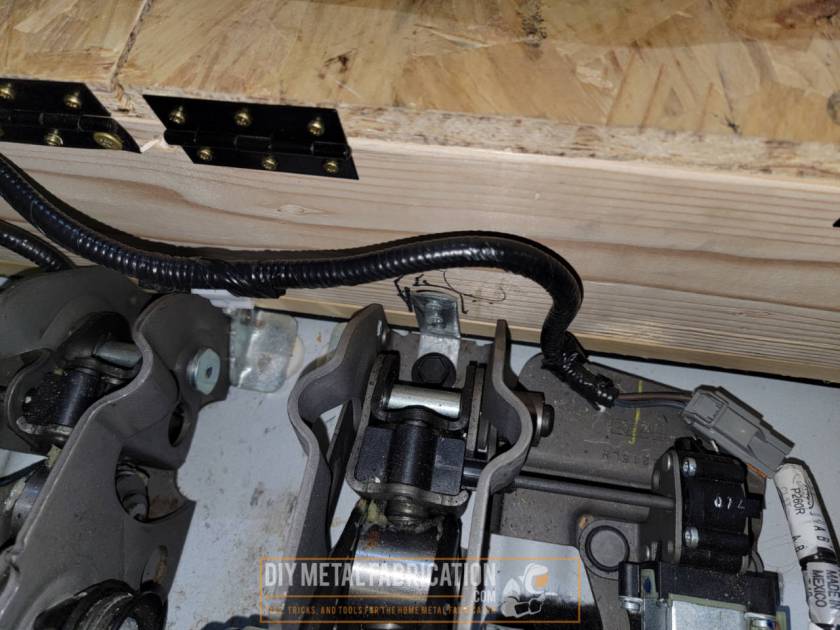
To complicate matters though, the Expedition doesn’t have a flat floor like most SUV’s. There is a depression in the floor that houses the jack and weird plastic tray thing I mentioned earlier. Also with a drawer system in there, I would be unable to lower the spare tire because towards the rear of the vehicle where the jack is, there is a plug in the floor to access the crank to lower the spare. My other requirement was also not met in that I didn’t want to reduce the storage space inside the truck since we regularly fill it up for lake / road trips. In the end I decided a drawer system really wouldn’t have been a best pick.
Tearing things apart
One night after probably too much coffee… I ripped it apart (taking things apart is kind of my specialty). Sometimes you just gotta get started and improvise as you go.
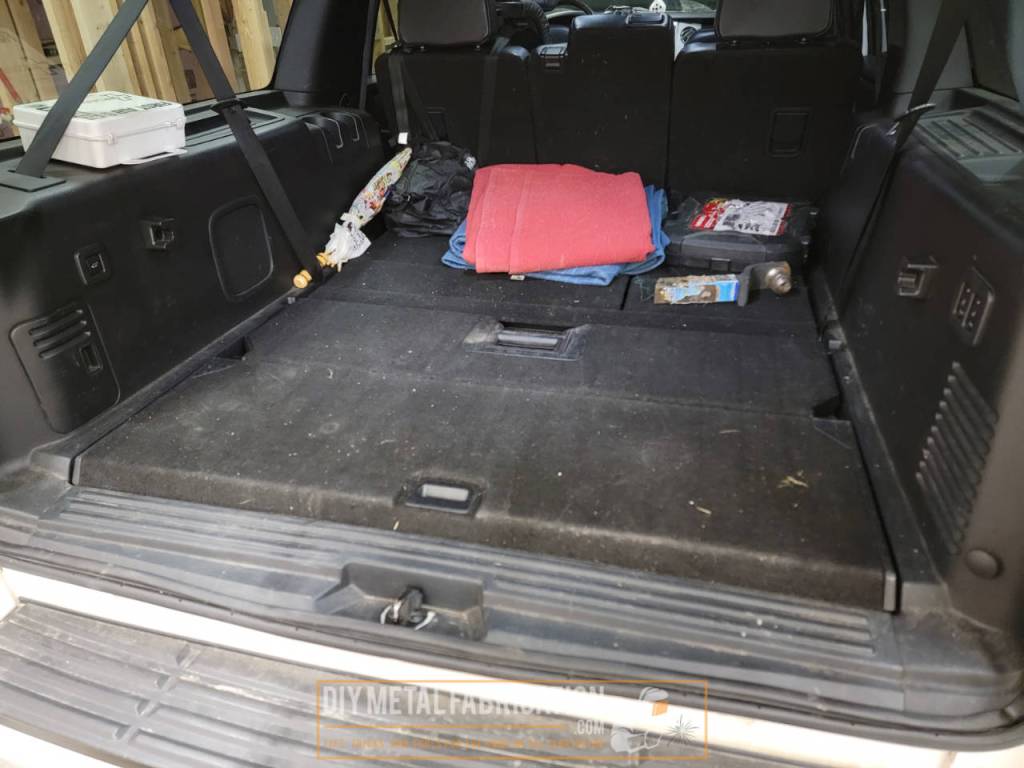
As a side note, the white box on top of the left fenderwell in the picture above is a well stocked first aid kit. I just used velcro strips to attach it. Since it is on the drivers side, it doesn’t block my view and hasn’t been in the way at all. It is also easy to identify and access. So far the only thing I have used out of it is a band-aid, but I should really do a separate article on emergency preparedness.


Prototyping

Random side note: I was a little concerned about having Independent Rear Suspension when I got this truck since I tow a lot. When I was growing up I was always taught/believed ‘real trucks have solid rear axles’, but now understand why manufacturers made the change. This is one of the smoothest driving and quietest vehicles I have ever driven. Also, these have way more room on the inside and the seats fold flat to the floor vs older SUV’s that had solid axles in the rear where the rear set of seats didn’t go into the floor at all and there was no leg room in the 3rd row. I think most of the current model Suburban / Yukon / Expedition / Armada, etc. have changed to IRS now. Having IRS hasn’t caused any issues or even really mattered yet, guess we will see for long term tire wear.


The sharpie line toward the rear was my go/no go line for closing the tailgate. It was a little further toward the front in that pocket where the latch mechanism is.

I don’t have much for wood working tools, I imagine a scroll saw could have made this fancy cut easily. It won’t be visible anyways, so it doesn’t need to be pretty.


Adding hinges


Fastening down the box and lid


Toolbox Lighting and Door Shocks


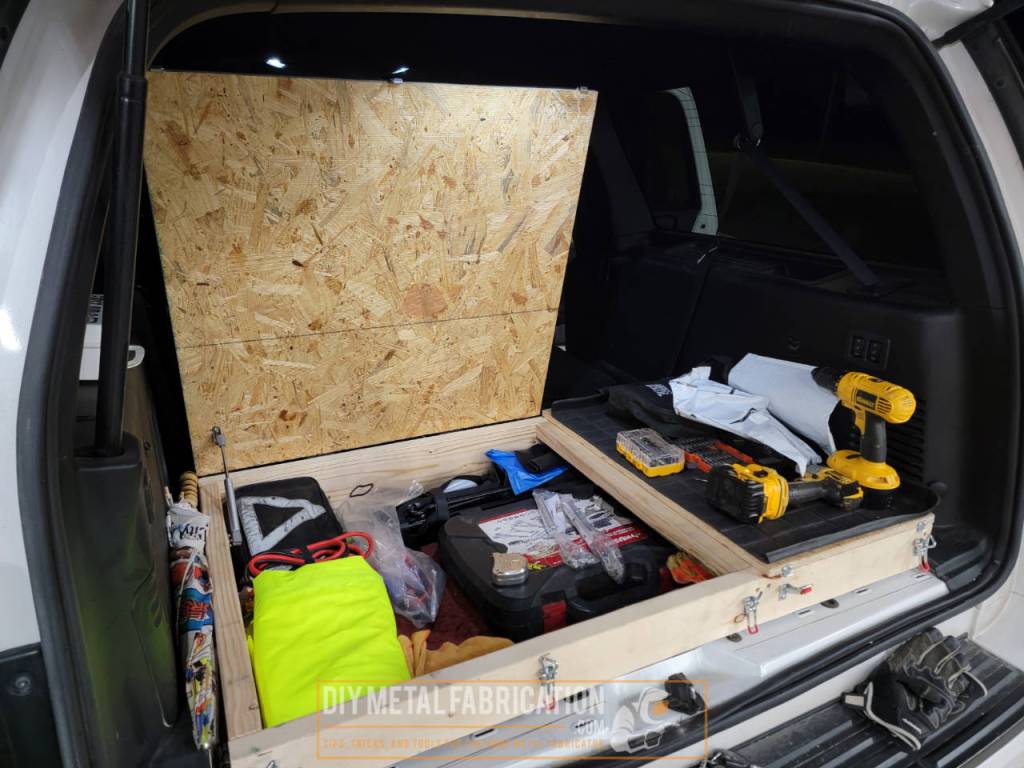
The cargo lamp lights it up nicely when the lid is up. I converted the whole truck to LED shortly after I got it. I tend to leave the doors open often when I am working on stuff and didn’t want to wear the battery down or get stranded with a dead battery. There is no way to turn off the dome lights and they stay on for around 10 minutes every time one of the doors is opened.


Fastening the box down
No point in building the box if the box ejected itself in a wreck or something. I decided to fasten it down pretty good. In addition to the seat bolt, I also have four other bolts holding it down.

What is a RivetNut / Nutsert tool and how do I use it?


It is kind of tight in there so my Sharpie marks are super special while I was marking the bracket so I could take the box out and screw the bracket on.
Working on the details and door shocks


I had never used them before, but these toggle latches are really cool. To adjust how tight they latch, all you do is twist the head. I thought about trying to find locking ones but that would have been overkill since the box will be inside of a locked truck anyways. I would call my truck tools my ‘tier 2’ tools. They are the duplicate / old / retired tools from the shop that have already paid their due or were cheap to begin with.


I forgot to take a picture of them but on each side of the box at the front and the rear (total of 4, one at each corner), I bolted on some tie downs. This will give me a hefty place to strap down to.

What do I keep in my truck toolbox?
I try to keep tools and supplies with me that I know would get me out of ‘most’ situations without being ridiculous or excessive. Here is a high level list of my typical inventory:
- Disc golf discs
- Socket set
- Lots of ratcheting tie down straps and some bungee cords
- Hand tools (screw driver, flat head, hammer, knife, pliers, etc.)
- Reflective rain repellant jacket
- Jumper cables / emergency kit
- Tow strap
- Tire plug kit
- First aid kit
- Umbrella
- Gloves
- Sometimes a battery powered drill with drill bits and a bit set
- A couple of flashlights and spare batteries (The free harbor freight flashlights are great for this)
- Extra bottles of water
- Usually a couple of moving blankets or old quilts / comforters
I try not to go crazy or add a lot of weight. I do have enough tools on hand though to make most minor household / roadside repairs away from home. There are also enough supplies for the family to have water, warmth, and medical attention if an emergency happened since this is our roadtrip vehicle.


I will eventually finish this up by painting/carpeting it and making a flap that covers the gap to the seats. I am super happy with it the way it is now though.
I had initially wanted to build this out of metal but all of my metalworking gear is buried since I am still working on the shop. I didn’t buy any materials for this project other than hinges, latches, and door shocks. The rest of it was all scraps from the shop build.
In all actuality this could have been a lot nicer and more compact if it was built out of MDF similar to how a subwoofer box is built instead of 2×4’s. My excuses for that right now is that wood is expensive and I don’t have a table or track saw so the cuts would have looked like crap. Really my point here is that it doesn’t matter, use what you have and make something that makes your life more efficient or easier.
Now YOU, go outside and work on something!
Got a project in mind?
If you're tired of getting ignored by big shops or just want someone who actually gives a damn about the build, that's what I do.
Let's talk →