Continuing the adventure on finishing out the shop. We painted the house to match, started hanging insulation, added more drainage, an inadequate portable air conditioner and spotted one (tiny) wild animal.
Hope you all are enjoying these posts and possibly learning some stuff. If you aren’t enjoying them then I’m not sure why you are still reading, but I will continue to write them anyways because they are cathartic for me. It gives me something to remember the details, move on in my brain to the next step, and hopefully save you all some trouble or give ideas on your projects.
The shop has been great so far. While it isn’t quite done to my liking yet, it is functional and has been a big help especially this year with the RV and boat shenanigans. Having the ability and space to bring big stuff in and work on it or process through it is great. I am over the moon grateful that I have been able to do this project both financially and physically.


I did some back of the napkin math and figured this would get me in the general ballpark without overshooting too much, though in hindsight it would have been better price wise to overshoot and return any extras due to the discount.


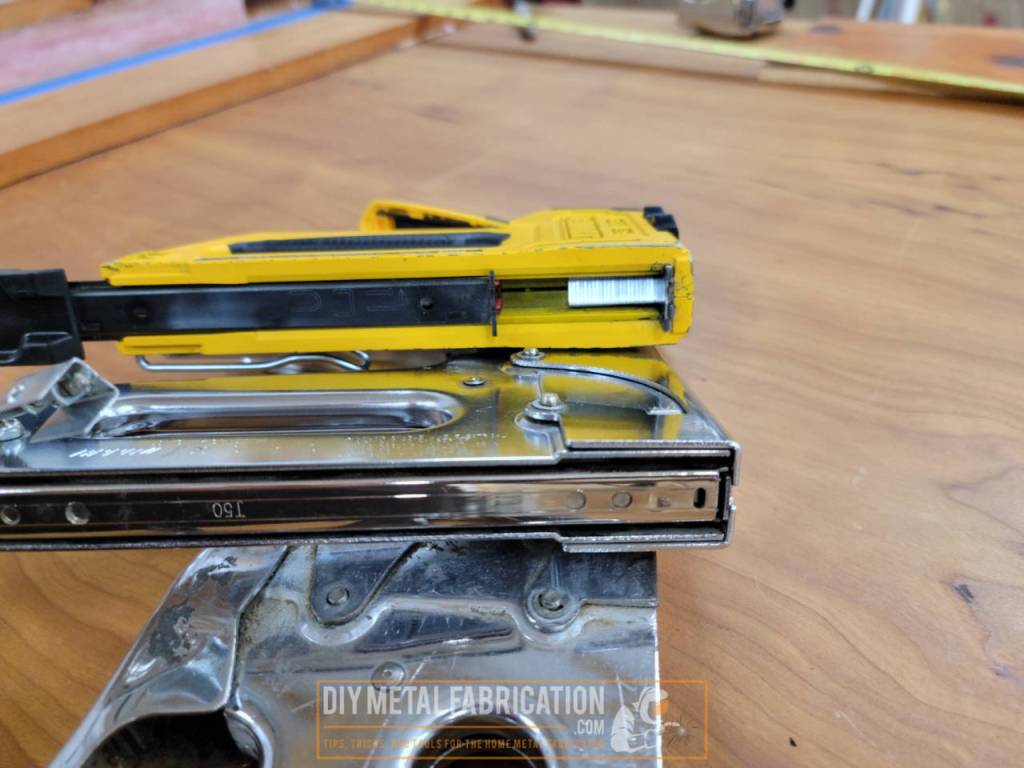
Lets talk staplers
At this point in the job is about the point that I realized this was going to be very difficult if I tried to continue with the stapler I was using. I had accidentally dropped my Craftsman stapler off the ladder earlier this year when stapling up the speaker cables and cracked the cast aluminum case to where it wasn’t usable or fixable. So I went to Walmart and bought an Arrow ‘Heavy Duty’ T50 stapler thinking they have made these just like this basically forever so they must work right?
Wrong. The Arrow stapler I bought SUCKED. So I rummaged through my dad’s tools and found another one just thinking that I got a dud. Turns out that one SUCKS too. He also had a hammer tacker but I found it difficult to hold the insulation up on the ladder and swing it at the same time. They all jam every 10th staple and I had A LOT of staples left to go. So I bit the bullet and bought a more expensive stapler and am glad I did.


On the Arrow staplers, you have to curse at it, go grab a pair of pliers, try to rip the staple out of the tiny hole while it breaks into tiny pieces, curse at it again, then get 10 more staples in before you get to un-jam it again.

Painting the house to match
It was always our dream to have the house match the shop eventually. Our house was getting to the point where it needed painted anyways, so it was time.


A small bit of drama ensues

The house body color came out in a cilantro-y green yet the shop looked to be more tan in color. We were dropping some pretty big $ on getting this done and didn’t want to regret it for the next 7-10 years. So the painters took the shop metal sample back to Sherwin Williams and had them run it in their paint matching computer 4 more times in which it came up with a different color each time. They said since the shop was steel / metal, it was harder to match the color.
This got us closer to the goal, we were able to paint it on the sample piece of shop tin and you literally couldn’t even see where the paint was once it dried. It was a pretty much exact match to the tin. So we hand painted a couple of spots on the house but it still looked kinda green.
Out of frustration, I reached out to the builder Farm and Home Buildings (who are freaking fantastic by the way) and our rep Dan got us actual paint colors from the metal manufacturer. I took a look at the paint color it matched up to and wouldn’t you know it, the color has green in it. It was basically the same color that Sherwin came up with. At this point we were totally lost for what to do so we asked the painting company rep to see if his Sherwin rep might be able to come by. As a confounding issue, paint is expensive and we already had 5 gallons of it mixed up that neither us or the paint company wanted to eat in cost.
The next day Bob the Sherwin Williams rep (I think he was the district manager) came out and took a look. This situation was so interesting because the metal on the shop technically matched but changed colors in different lights and looked totally different when on the house. After some discussion we got down to us just really not wanting the house to be green and would rather it be in the tan family to ‘appear’ like the shop even though it isn’t a technical exact match.
I kid you not, the guy goes “Well, Maroon will take some of the green out, but might darken it up some. You won’t want to add too much yellow, so I would put some gold into it instead which will add some tan and lighten it back up.” then continued “Stop by the store and have them add 2/32 and 1/64th of maroon and 20/32 of gold. But probably have them start with half that then check it before adding the rest.” So after he left, I went up to the store myself and brought some heavy duty white paper and a paint brush with me. I had them add half of the mixture, painted an 8×10 sample but didn’t see too much change, so I said screw it and had them add the rest. As far as I could tell from the swatch and sample painted on the house, it looked pretty good.
A couple days later, the painters were back and with some hesitation we just had them go with it. At this point we were fed up and just wanted to be done with it. Here is how it came out:


I’ll be damned though if the color wasn’t an EXACT visual match. I personally called Bob the next day to thank him for saving our butts. He told me he had worked in a Sherwin Williams store for 22 years before he had become the district manager. His skills must have stayed pretty sharp, because he nailed it on this one. Thanks again Bob.
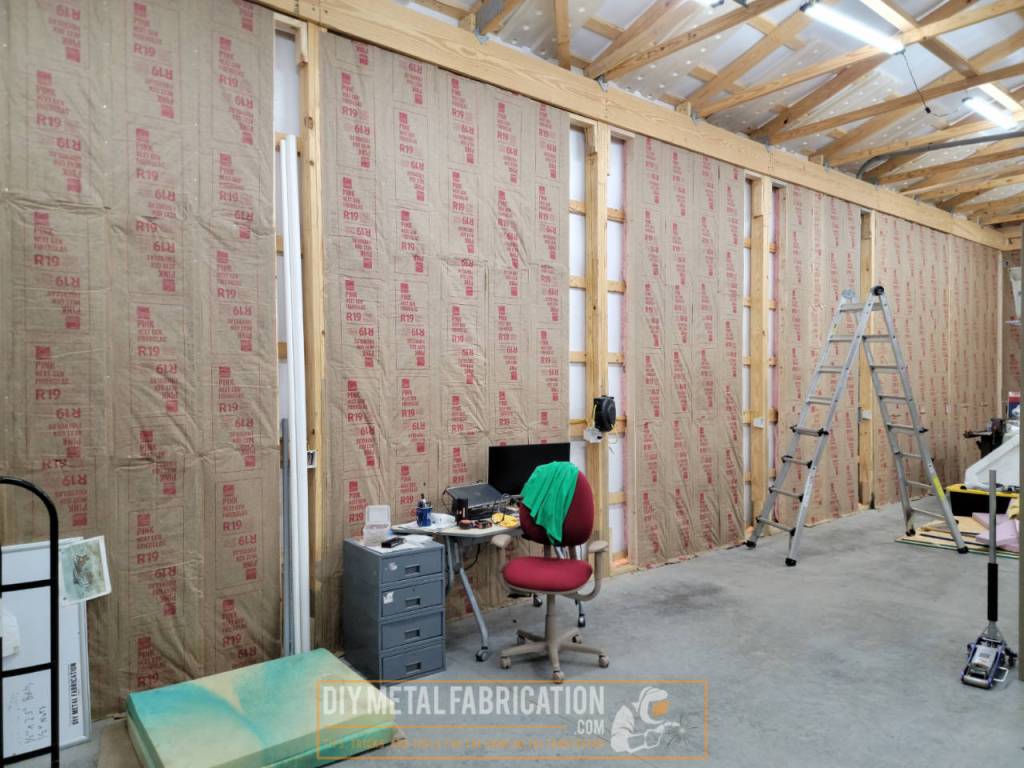
Back to Insulation


For the super skinny cavities like the one in the corner though, I will have to figure something else out.

I clamped a 1×12 to the table as a sacrifical surface for the knife to cut. The blue paint tape is at 48″ for the short cavities. Then when doing the long cavities, I just measure out one length, mark it with a sharpie instead of cut it and add another equal length to make 96″. The 1×12 on the top was used to smash down the insulation so I could cut it with a box cutter knife. This worked out great and sped me up since I didn’t have to get the tape measure out every time.
Parting with a neglected project
While cleaning the shop trying to make room to work on the walls, I got kinda frustrated and decided to let go of some stuff. My sister was having a garage sale and we had gotten a truck and trailer load of stuff out of the house which felt great. I needed to free up some space in the shed where there was one lurking unfinished project that had been patiently waiting for me to ‘get back to it’ for about 7 years. I decided to pull it out and put it on FB Marketplace and see what happened.


I like smoked meats as much as the next person, but I don’t have the time or desire to watch meat cook for an entire day. I’ll leave that part to the BBQ restaurants so I can be in the shop instead.
Sure enough 10 minutes after listing it I had a guy blow me up saying he had been looking for just such a project. After showing up and looking at it he told me he was going to try to negotiate the price but after seeing it in person, gladly gave me full ask and I helped him load it. So this marks the end of an era but I have no regrets. The new owner was super nice and seemed pretty legit in his Ghostbusters themed excursion, so I think it has a pretty fun life ahead of it.

Random details
It is fun to start putting finishing touches on stuff. This is a small thing but I thought it was neat. I put a cover on the socket underneath the breezeway. This socket is wired in with the lights so it switches with the outside lights, but I thought it would be convenient to have for Christmas lights or charging my security camera. While I was shopping, I didn’t want one of the big bubble in use covers since this would be super visible. It is a white in use outdoor cover to match the tin but has a go-go-gadget expander feature for plugging in bulky plugs.


Back to insulation…

It does however do a pretty good job at taking the humidity out though. This unit puts out a significant amount of water whenever I am running it, so I took the plug out of the drain on the unit and drilled a couple of holes in the top of that storage tub so I didn’t have to empty the tank all the time.

For those that have been reading along, I was very specific in my post Ford Expedition Custom Rear Toolbox about not wanting to lose any storage space. This trip and all the junk we hauled to the garage sale and thrift stores last week confirmed that I made the right choice to not take up too much room.


Also worthy as a symbol for how slow my progress on the shop has been.
That is all for now! I am getting really close to sheetrock but I still need to run a couple of ethernet lines just in case before I finish insulating. Next up also is finishing some of the bathroom plumbing and getting ANOTHER inspection. Oh, and I might have drug home another project… Stay tuned!
Now YOU, go outside and work on something!
Got a project in mind?
If you're tired of getting ignored by big shops or just want someone who actually gives a damn about the build, that's what I do.
Let's talk →