Despite being on the struggle bus this year, I have actually made a lot of progress! Just about finished framing, plowed some giant snow drifts, broke some things, fixed some things, and got the exterior lighting finished.
At about 5 months since my last update, this is the longest I have gone without a post in a while. One of the big reasons for the delay is that I permanently lost a very important subscriber. My dad passed away from Covid 19 in January… he will be missed greatly. I am very grateful for all the skills he passed on to me while I was growing up, if it wasn’t for him I wouldn’t be able to do half the stuff I do.
So, that sucks and slowed things down pretty significantly. We are finally getting to the point where the train is getting back on the track though! We will have to carry on.

My fleet ready for the snow.
Lots of projects have gone through the shop at this point. Most of which have been sold or flipped, but some have stuck around for a while. I traded the silver golf cart for the ATV with plow. It plows well but shifting to reverse is kind of a pain. So I ended up using PJ for the most part this winter because it has a heater and I can throw the kids in the back.


This threaded rod is the part that I use to set the angle on the blade. It is pretty hack but works so I don’t plan on changing it at this point.
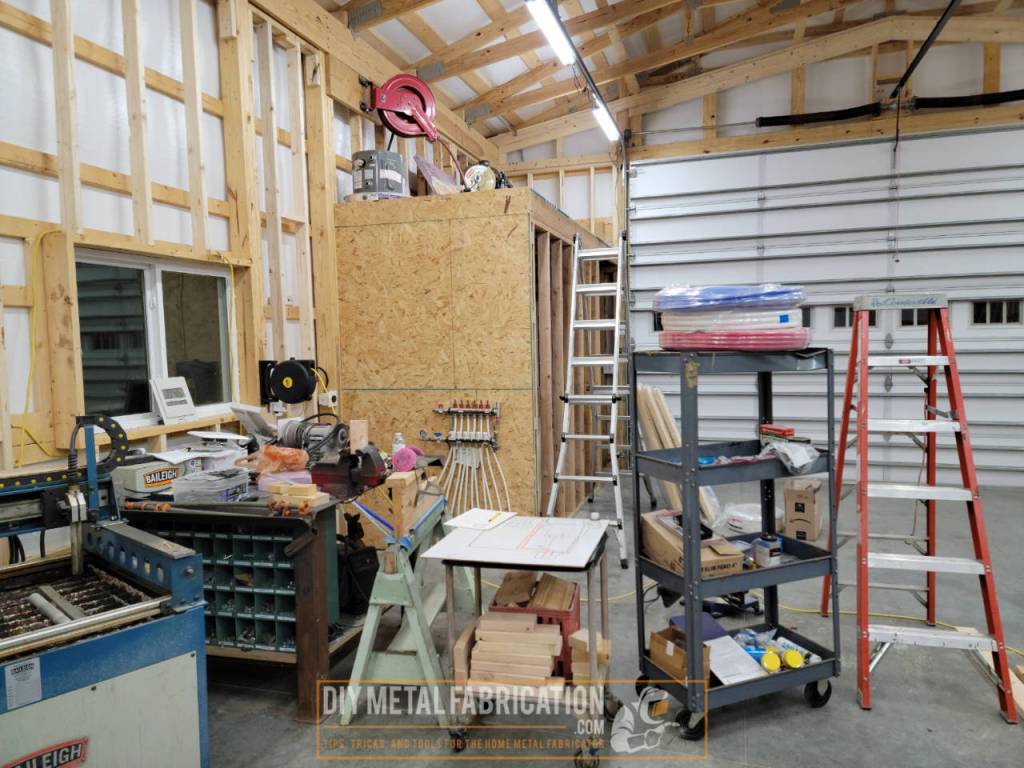
Shop Progress


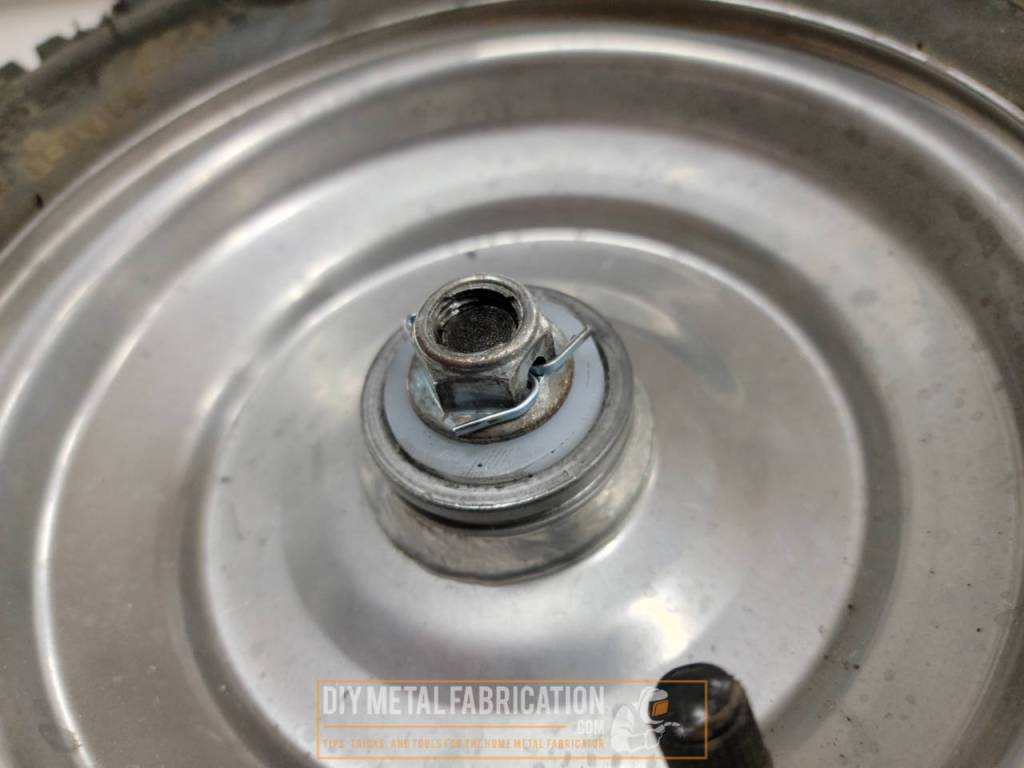
Random repair
The front wheel on my kids’ electric go cart kept falling off. The bearing toasted itself and the spindle nut screwed off in the same direction as the wheel turned with no cotter pin so it kept falling off too. I didn’t want to go on a wild goose chase for some new bearings so I decided to make my own. I have found now that I have a critical mass of tools and junk parts that it is often easier for me to just make something than it is to research and find the direct replacement (if it is even available).


Future tube
I have had this idea for a future tube for a while now. I wanted a way to run wires for my tech gadgetry through at least a couple of areas of the wall. I plan on having an office desk, projector, and surround sound inside the shop, so I might as well plan for it now. The 2″ tubing is WAY overkill but will make it easy to pull even cables with big heads on them through like DVI, HDMI, etc.


Once I got the drop over to the ceiling, I was staring at the conduit body and decided to go ahead and use the outlet to go over to the East wall too since it was already there.

The way it is set up now with the future tube, I can have HDMI cables or whatever running up to the projector from either the back wall or the East wall. Once the shop is done, I plan on also working from here when it is nice out since I work from home permanently now.
To the right of the picture you can see at the top of the back wall I have a power outlet for a TV and a stop in the conduit so if ever switch from a projector to a TV, everything will already be there. Going to be ready for a movie night!

I got a full 3 meals out of this with the leftovers.
DIY Trailer Jack Wheel


More shop progress
Not going to lie, I admit I am running out of steam. Huge thanks to my buddy Russ that just quit his fulltime desk job to do remodels fulltime. I was one of his first customers, and he ended up spending 3 full days in the shop finishing up things that I ran out of time and motivation to do. Worked out great for both of us!

I had some pretty major changes from the original plan. In the last year+ since the shop was built, I have only been dirty enough to need to rinse off like twice. So I nixed the full bathroom and instead decided to do a half bath with a ‘mechanical room’. I found that when I put the air compressor up on the mezzanine the vibration transferred through the breezeway into the house and was just generally kind of loud. Now that I am not putting in a shower, I have the perfect spot to put the compressor inside a little room with some other mechanicals where it will be quiet and easy to access.


Finishing touches on exterior lighting
Another project Russ finished up for me was installing soffit lights on either side of the outside of the shop and finish cutting in the lights in the breezeway. He also sealed up all the penetrations with fire rated foam (code) and installed the soffit vents while he was at it.
The plan really came together and I am VERY happy with it. The soffit lights will be great for finishing up outside work when it gets dark out.


That is all for now. There has been a lot going on and I didn’t document all of it. Now that things are slowing down I am hoping to get back to working IN the shop and not ON it (among 100 other things that are going on). That all sounds like a bunch of whining though, so I will stop now.
Next things up are to get a final rough in inspection so I can insulate (then get the insulation inspected) and eventually slinging some sheetrock!
Till next time… YOU, go outside and work on something!
Got a project in mind?
If you're tired of getting ignored by big shops or just want someone who actually gives a damn about the build, that's what I do.
Let's talk →