Today we prep for the radiant heated floor tubing by laying down the foam, building forms, and double checking layout measurements.
We left off Progress Report 7 with a fully built building and some freshly laid down gravel and vapor barrier.

In case you missed it, check out the link below to my other post on all of the parts I bought for my radiant heated floor install. I also go through how to calculate how much foam and tubing you need.
Getting to work on the Heated Floors
We were in late January at this point so my dad came over and helped me put some plastic vapor barrier over the garage door hole. This was TOTALLY worth it and I highly suggest it in the winter to help keep the heat in.

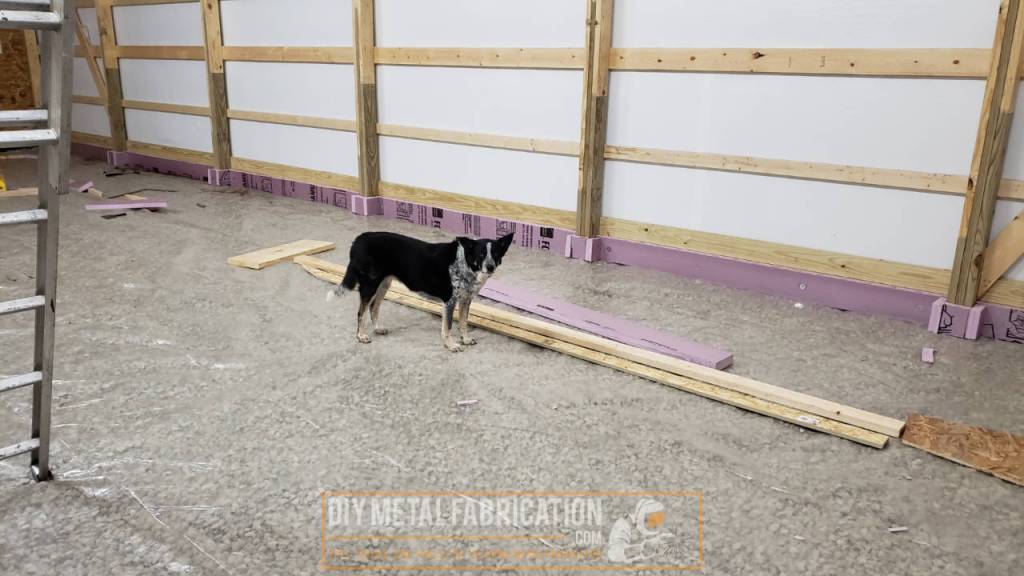
As discussed in Progress Report 7, the seam between the bottom two skirt boards is where the top of the concrete would be. Therefore I am measuring and cutting all of my vertical foam to be 7″ which is the distance from the gravel to the line. By making my foam this height, it is easier on the concrete guys because they know exactly where they need to be.
I do have one concern about the foam on the inside of the posts as seen in the below picture. Depending on how thick you finish out the walls, some foam could be left exposed. The way I calculated if I do a 2×4 flat on the inside of the posts then sheetrock over it then it will be completely covered. TBD, if I change my mind, I can always cover it up with some metal trim or something.

There are plastic ‘insulation’ washers made for attaching foam like this. I couldn’t find any at the hardware store, so I just bought a pack of 100 1/4″ fender washers, either one should work just fine. The main objective here is to spread the load from the screw so the screw doesn’t pull through the insulation. Links below in case you want to check them out.
Plastic Insulation Washers:

Metal Fender Washers:

How to cut XPS foam
This XPS foam stuff is pretty cool. As long as it is properly supported it is actually very strong. There are a bunch of different ways to cut it but here are the couple that I have found most useful
- To cut long straight pieces –
Take a straight edge or even just a straight board and lay it on the marks where you want to cut. Take a pocket knife (I found the box cutter blades didn’t stick out far enough) and make a slice down the foam along the side of the board. You don’t need to go all the way through, about half an inch is good enough. Next put a 2×4 under the foam to one side of where your mark is. Then take one hand on each side of the cut line and gently but sharply ‘snap’ the foam. Start at one end and work towards the other. You will hear it crack, once you get to the other side it is usually easy to finish the crack which results in a pretty straight line. - To cut short square/rectangle pieces – there were lots of these small ones around each post. Cut a long strip to the height you want (in my case it was 7″ from gravel to top of cement) then measure and score it at the desired length on one side with your pocket knife. Put the foam up against the corner of one of the posts with the cut line facing towards you and gently ‘snap’ the foam with one hand on each side. Hard to explain but once you have done it then it should make sense.
- To cut irregular shapes – Grab a battery powered sawzall with a coarse wood blade and go to town. Makes a mess but works great.


My kerosene heater was (and still is) a lifesaver on this project. It would have been MISERABLE out there without a significant heater. Buy yourself one of these or borrow one from a buddy if you can, they are totally worth it. The only downside is that kerosene is a little expensive at $5-$8/gallon retail. I believe you can run diesel in most of the heaters like this but I don’t like the smell so I pay extra for kerosene.

Prepping for the full bathroom
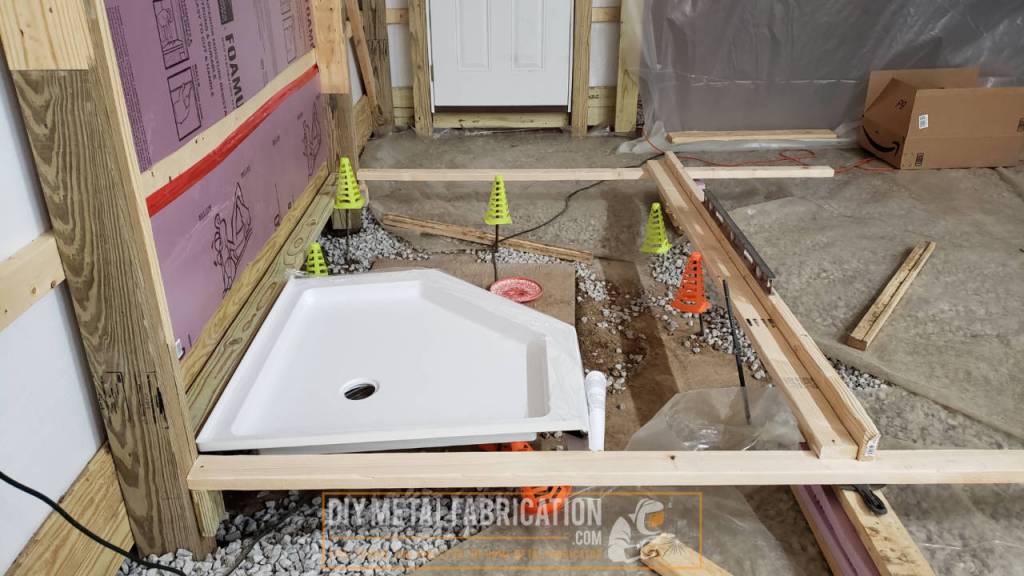
While we were working on installing the foam, we were also planning on how to form up the full bathroom. We needed to figure out where the radiant manifold, sink, toilet, shower, and a rough measurement on where the walls would end up.

I like having the physical part I plan on using with me which is why I got the shower pan out. Makes it easier to be sure of measurements. Note the location of the wall at the bottom of the picture below. It is on the garage side of this wall where I plan to mount my heated floor manifold.

Going with your gut – doing the right thing
I asked a LOT of questions to a LOT of people during this build. In most cases I could usually come up with a consensus on the right thing to do before doing it. However there are two things that I didn’t catch before doing them that I later changed my mind and had to go back and fix.
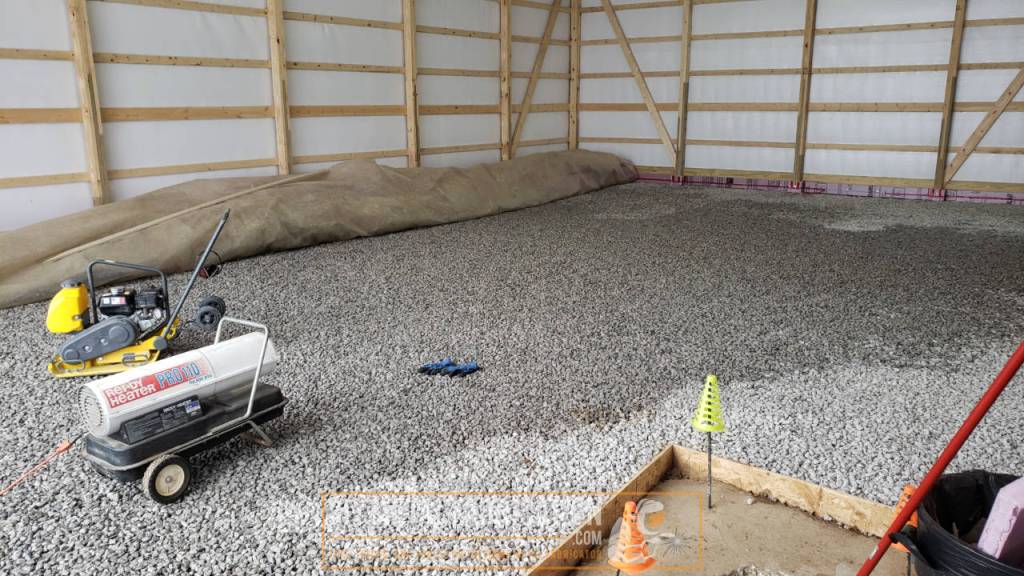
1. Always compact your gravel!
I had a dumb moment here and it cost me a LOT of time. The concrete crew came out and spread the gravel then laid down the vapor barrier. Nothing was said about compacting the gravel and therefore it didn’t ring in my head as a big deal.
We started laying down the foam and I did NOT like how the foam was moving around/floating on the rocks. In some cases it was moving so much that the taped seams were coming apart. After a couple of days/nights waffling about it I made the decision to pull up all of the foam we had installed and taped, compact the gravel, then put it all back down.
You only get ONE SHOT at doing this right. A $100 rental at Home Depot or your local rental store for a plate compactor is a drop in the hat compared to how much money was spent on the rest of the building. The risks of not compacting the gravel is great. Gravel that settles will no longer support your concrete creating the possibility for cracks, settling, and in my case down the road when I get a 2 post lift could cause a safety issue.
I suggest you just rent one, but if you want to check out a plate compactor or see what it looks like I left a link and pic below:

Pulling up and re-installing the foam

Before I pulled up any of the foam, I created a labeling system and labeled each piece with a mega sharpie. I went by row and sheet number, so starting at the back left it was 1:1 (row 1, sheet 1), 1:2 (row 1, sheet 2), etc. This made it super easy to get everything back in place with no guess work. So other than cutting the tape I was really only out just the man hours disassemble and reassemble. Having the foam already cut was a huge help.


2. – Don’t put any non-treated lumber below grade!
I couldn’t for the life of me figure out how to form around the footing in a way where we could pull the forms after, because it will all be below grade. I also couldn’t think of a material other than plywood that would hold back the gravel and could be cut to fit. Below is a picture of the first iteration built from plywood.

A couple of days later I was doing more research because it just didn’t feel right to have non-treated plywood below grade (a buffet for insects / termites). I did some research and other than saying no to putting wood below grade, there weren’t a whole lot of constructive suggestions either. At this point since I had worked with the 2″ XPS foam so much it occurred to me that I could use that instead. So I tried it… and it worked GREAT!


Once I build the wall for the bathroom, I will take the 2×6 off then attach these vertical tubes to the outside of the bathroom wall instead. If it goes the way I have it in my head, it should work out pretty well.

Pre-planning for a 2 post lift
The radiant is going to be awesome, but it does cause some constraints in that you have to know where anything that bolts down to the concrete will be before pouring any concrete. Therefore I spent quite a bit of extra time measuring to be sure I left enough room.
The general consensus is ~10ft from the front wall when using an asymmetric lift and ~3ft more than that for a lift with symmetrical arms. I covered the bases for both by making the boxes big enough for either. My planned spaces are 9ft – 16ft from the front wall which gives me plenty of room to do either lift type. I also left enough width to accommodate pretty much any lift.
By leaving the foam out, it is giving me an extra 2″ of concrete in these areas. I am doing 5″ thick concrete so in this area it will be 7″ thick. This makes it beefy enough to handle pretty much any 2 post lift.
For more info, I suggest you check out this good article at Greg Smith Equipment. I have no affiliation with them, they just did a good writeup / FAQ on it: https://www.gregsmithequipment.com/Where-Do-I-Position-My-Two-Post-Lift-In-My-Garage

That is it for today. There is a LOT of time in the prep work. The next article will cover actually laying the radiant tubing out.
Until then… YOU, go outside and work on something!
Got a project in mind?
If you're tired of getting ignored by big shops or just want someone who actually gives a damn about the build, that's what I do.
Let's talk →